My approach to painting evergreen trees is firmly rooted in the techniques we all know and love developed by Bob Ross. That said, over the course of the past year, I found myself spending a little extra time applying a few additional steps to achieve, what I consider to be, a more finished look. In this article, I will go step-by-step through each part of my process.
Step 1 - Create a Dark Mix
To ensure trouble-free color distribution over other paints layers, you will likely need a good amount of paint to lay in your evergreen trees. It pays to mix a large pile of dark paint that will be used to create the initial tree shape. There are times during my paintings that I make an attempt to conserve paint; this is not one of those times.
Using a palette knife, mix together a color combination appropriate to your composition. Commonly, you will use some combination of Midnight Black, Prussian Blue, and Alizarin Crimson, but Van Dyke Brown, Sap Green, Phthalo Green, or Phthalo Blue could also be used.
Step 2 - Commit to a Position
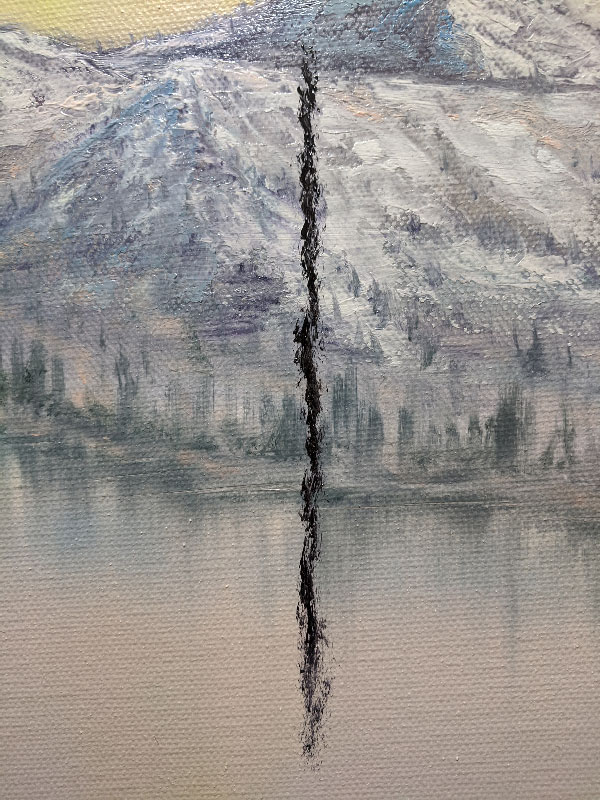 Looking at your composition, determine how tall your tree will be and where it will be located. Take your time and make compositional considerations such as deciding which background elements will be covered up and which will be preserved. Also, take into account any technical issues a particular tree position may incur. One example might be creating a tree over the dense white snow painted on a mountain, which will be more challenging to paint over. Once you decide, load up your Fan Brush. I tend to use the smaller #3 fan brush, but the larger #6 brush would be equally suitable. Try to load enough paint into the bristles to create a smooth, even brush edge. Using the corner of the brush, draw in a line indicating the center of the tree from top to bottom, accounting for the whole length.
As you can see in the illustration above, this line doesn't have to be particularly even or well drawn. It is primarily a guide to help us through the next step.
Step 3 - The Z Tree
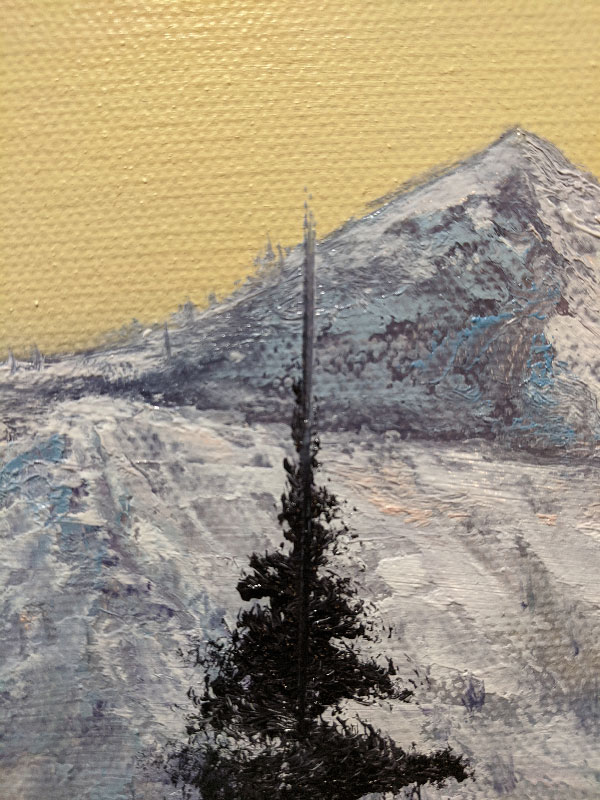
 This step is just like what Bob does. With a fully loaded fan brush, go back and forth from the top of the tree creating the indication of limbs, applying more pressure and covering more horizontal width as you develop the tree shape downward. The top of the tree will require a more delicate touch.
Try to keep the size of your tree under control during this stage; it will be much easier to make it bigger later, but not so easy to make it smaller.
Notice that the tree shape in the illustration is not the idyllic profile we eventually want and is rather crude. That is okay at this stage since we have only just begun.
Step 4 - Cut in the Treetop
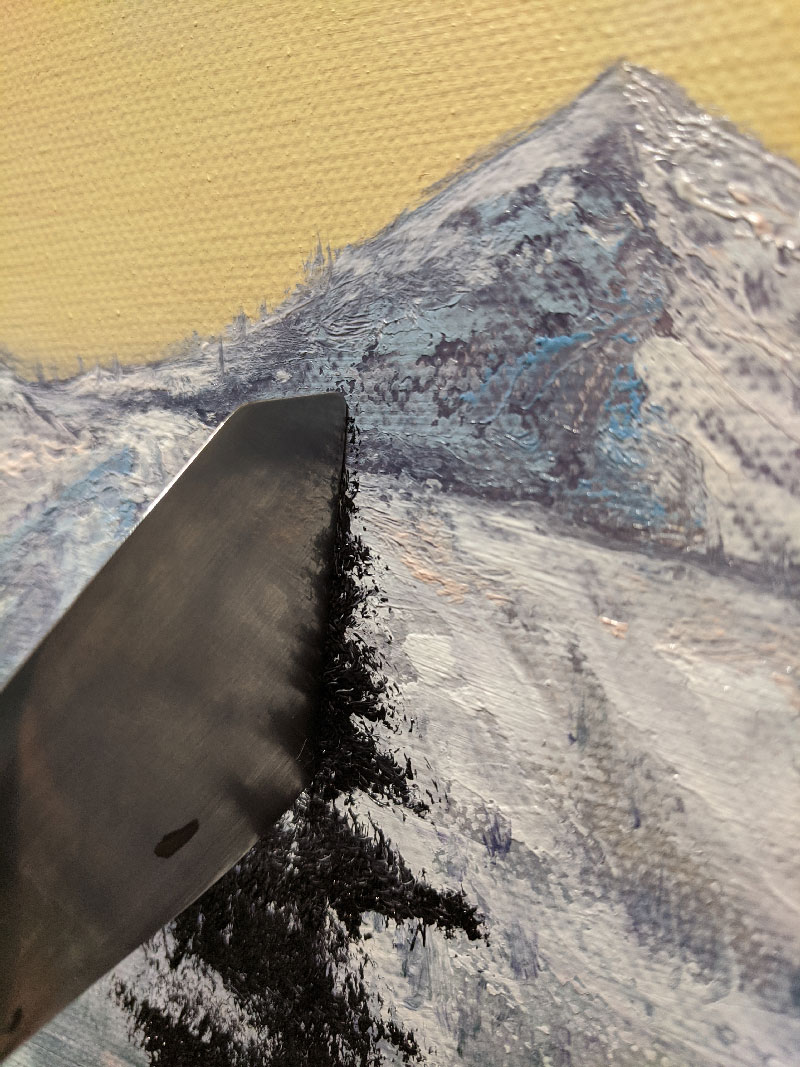
 To help add a sharpness and intentionality to the tree, I often use a clean palette knife to slice up into the top of the tree, dragging some of the dark paint up a little bit higher, which makes a quick and easy representation of the extremely thin, new-growth trunk common to the top of an evergreen tree.
For this procedure, I prefer to use the larger #10 palette knife, not because of its size, but because the blade is thicker than the #5 knife. The thicker line created by the #10 knife appear more deliberate and easier to read from a distance.
Step 5 - Indicate a Trunk
 In order to create the indication of tree trunk, create a mixture of Titanium White, Dark Sienna, and/or Van Dyke Brown using your palette knife. However, take care not to overmix these colors. Leaving it "marbledy" will will allow you to easily transfer pre-modulated color onto the canvas. This will help create the illusion of bark texture in your tree trunk.
Once your color has been mixed, use Bob's trusty knife technique to apply the paint to your knife. In other words, pull the out paint flat and cut across, leaving a roll of paint out on the edge of the blade.
Then, lightly touch the loaded knife to a few areas down the center of the tree. You only need a few spots and they don't have to be perfect since much of it will be covered.
Step 6 - Coax out Needles
This finishing step is what I think gives the evergreens that little extra polish which aids in sitting them into the landscape. To perform this step I use a hog-hair bristle dagger brush I made by cutting the bristles of a flat brush to an angled point.
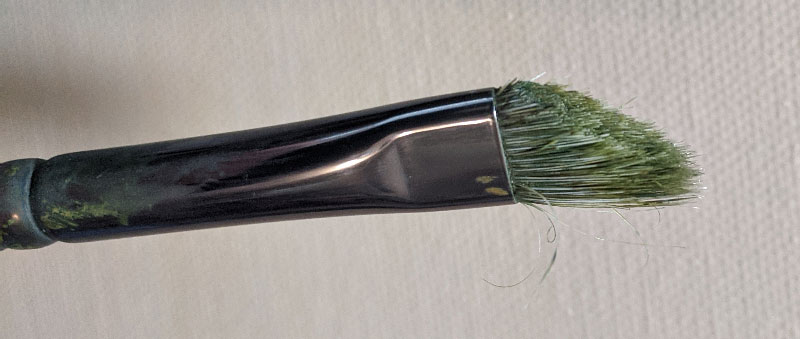
I assume there are better alternatives to this do-it-yourself approach, but I haven't found one yet, to suit my purpose.
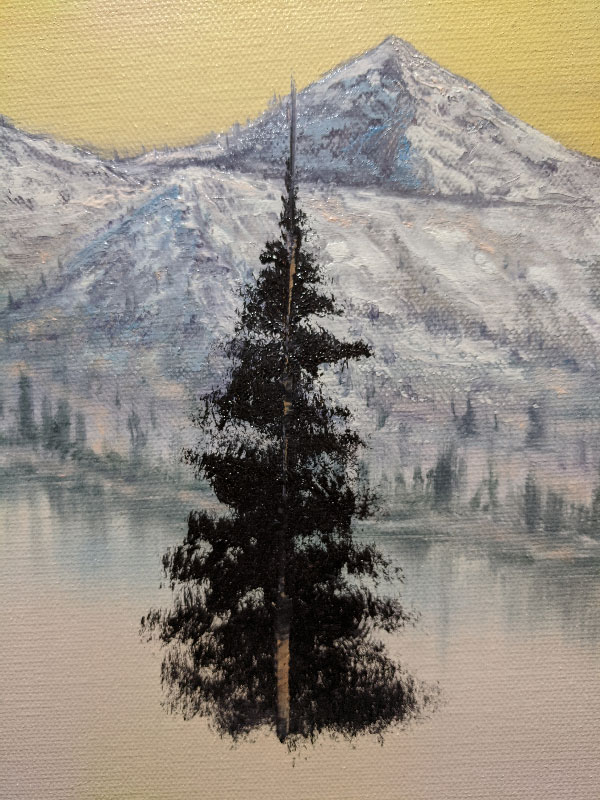
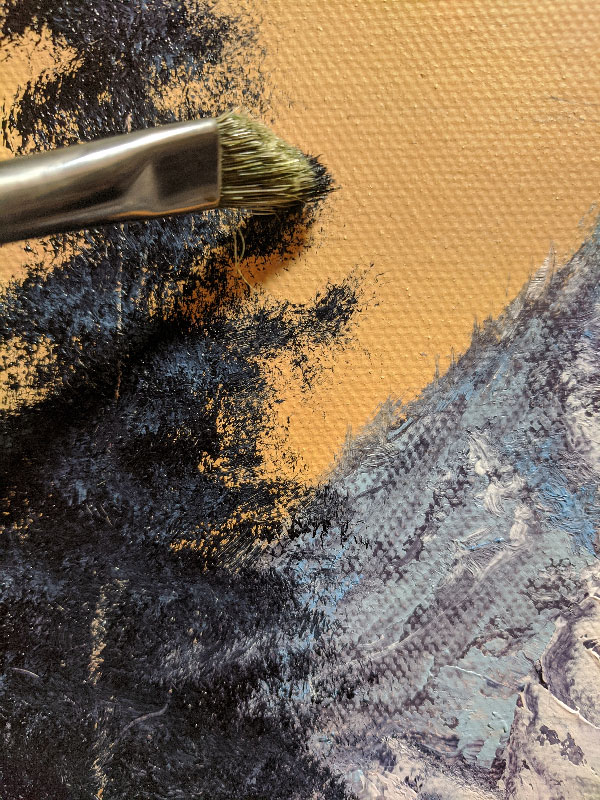 Using the outside edge of the tip of this dagger brush I go around the outside of the tree and lightly use the coarse bristles to drag out a little bit of the dark tree color into the shape of small needle clusters and branch tips. Each stroke produces only a few small lines which I liken to pine needles. This gives a fine-grain control over the final tree shape and allows you to explore more realistic branch designs.
 Additionally, I look for artifacts, usually a certain type of splotchiness, obviously produced by the fan brush in Step 3 and blur that out using the tip of the bristles. You can see in the illustration how the left side of the tree has been shaped and refined and the right side remains splotchy and sits on top of, rather than in, the painting. Do not get too fussy about removing these artifacts or creating pine needles using this brush. This step should not take too long and is intended to only imply detail. If too much time is spent finessing each branch, the tree could risk losing its vitality and individuality.
Step 7 - Highlight
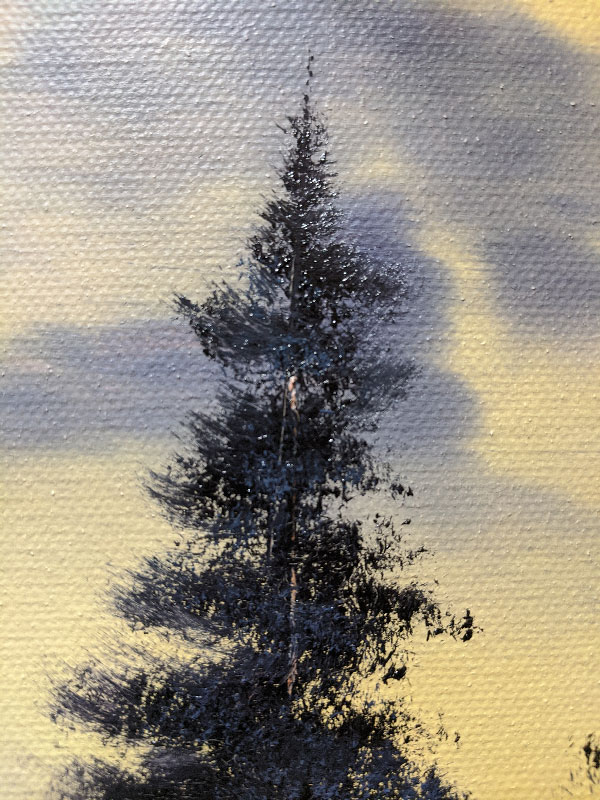
 Evergreen trees are usually quite dark and readily absorb light. With this in mind mix a moderately dark highlight color that will give dimension to your tree without creating an unrealistic amount of contrast. I think because Bob Ross painted for television, his highlights are mixed a little brighter. In my own paintings, I usually opt for much darker highlights, but in the end deciding the right amount of contrast is totally dependent on your preference and the specifics of your composition.
Notice in the illustration that much of the tree trunk we painted in the previous step has been covered by the grayish, frost highlights.
Step 8 - Finish
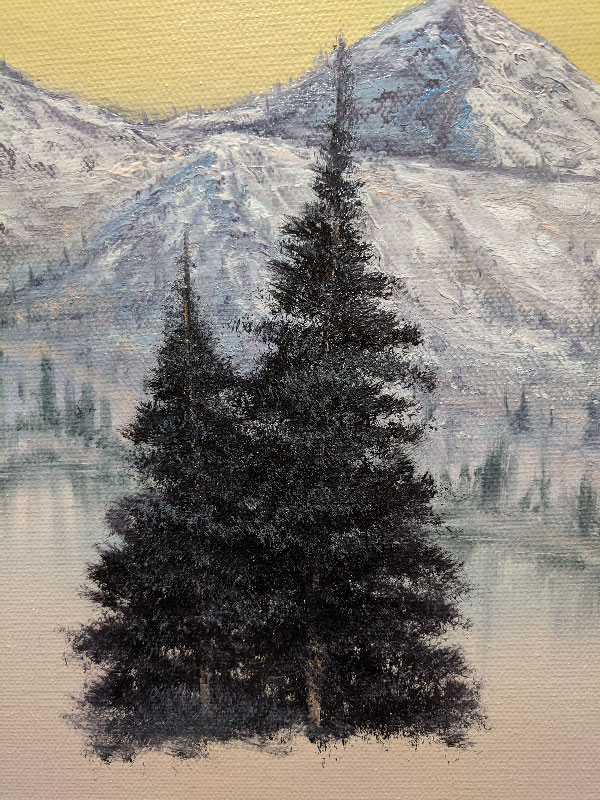
Once you are happy with your tree, step back for a moment take another look. Does it need brighter highlighting? Are the shapes convincing and pleasing to the eye? If need be, take a minute or two to go back and make adjustments. Again, try not to go overboard, just a few extra marks here or there and then move on to your next element.
I hope this helps!
Wow, beautiful and Thank you for the step-by-step.