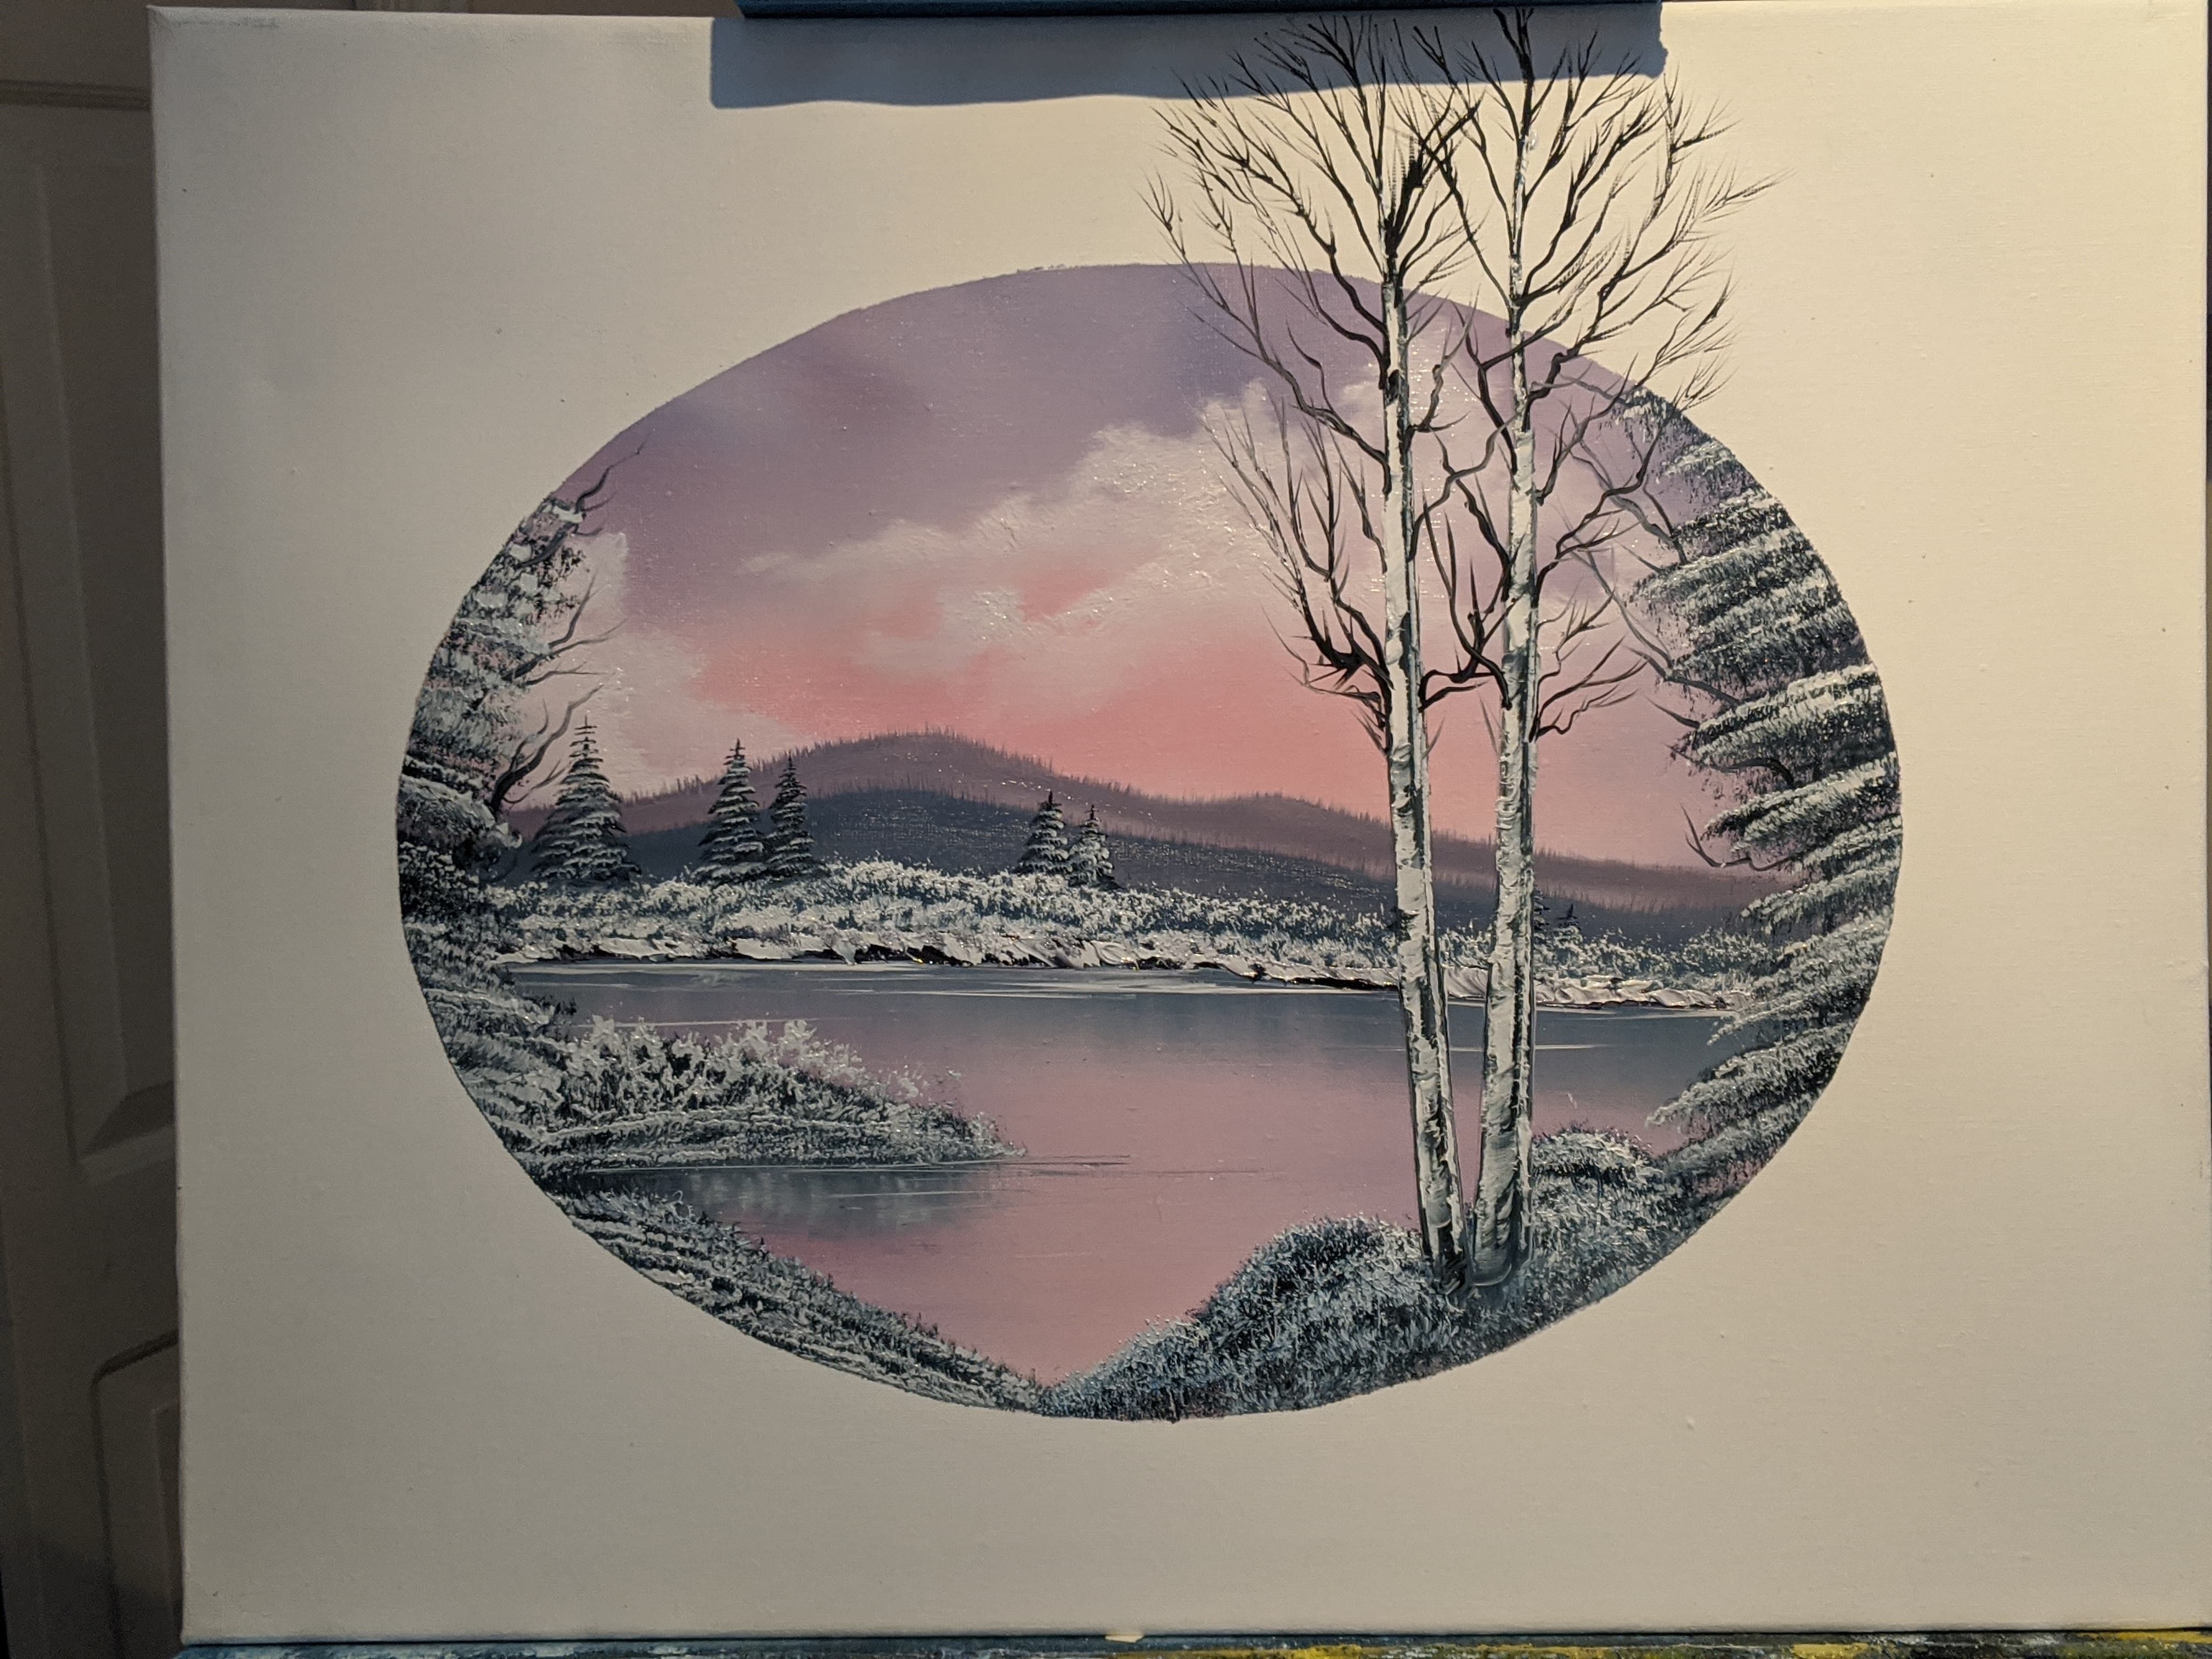
I received a request to write an article on how I painted this one. A lot of it will reflect what I had posted in the descriptions and comments.
Overall, this was an attempt on my part at practicing 'speed painting.' I kept this painting at just about an hour with an extra 10-15 minutes spent on tree detailing with the liner brush. This was a very pleasant experience and I highly recommend trying this specific painting as it isn't too difficult and it may be a good candidate to practice this speed painting approach and also, to try and let your own style shine through.
A few bits of preliminary information - I used contact paper and an old plate I got at a thrift shop to cut out the oval outline. This was a value brand 16x20 canvas that was supposedly gesso primed one time. I usually prime my own canvases twice. This time around, I added one coat of good quality gesso I got at the art store. The canvas still had a bit of 'tooth' to it. I found this level of 'tooth' to be ideal so I've been priming my canvases this way with one coat since.
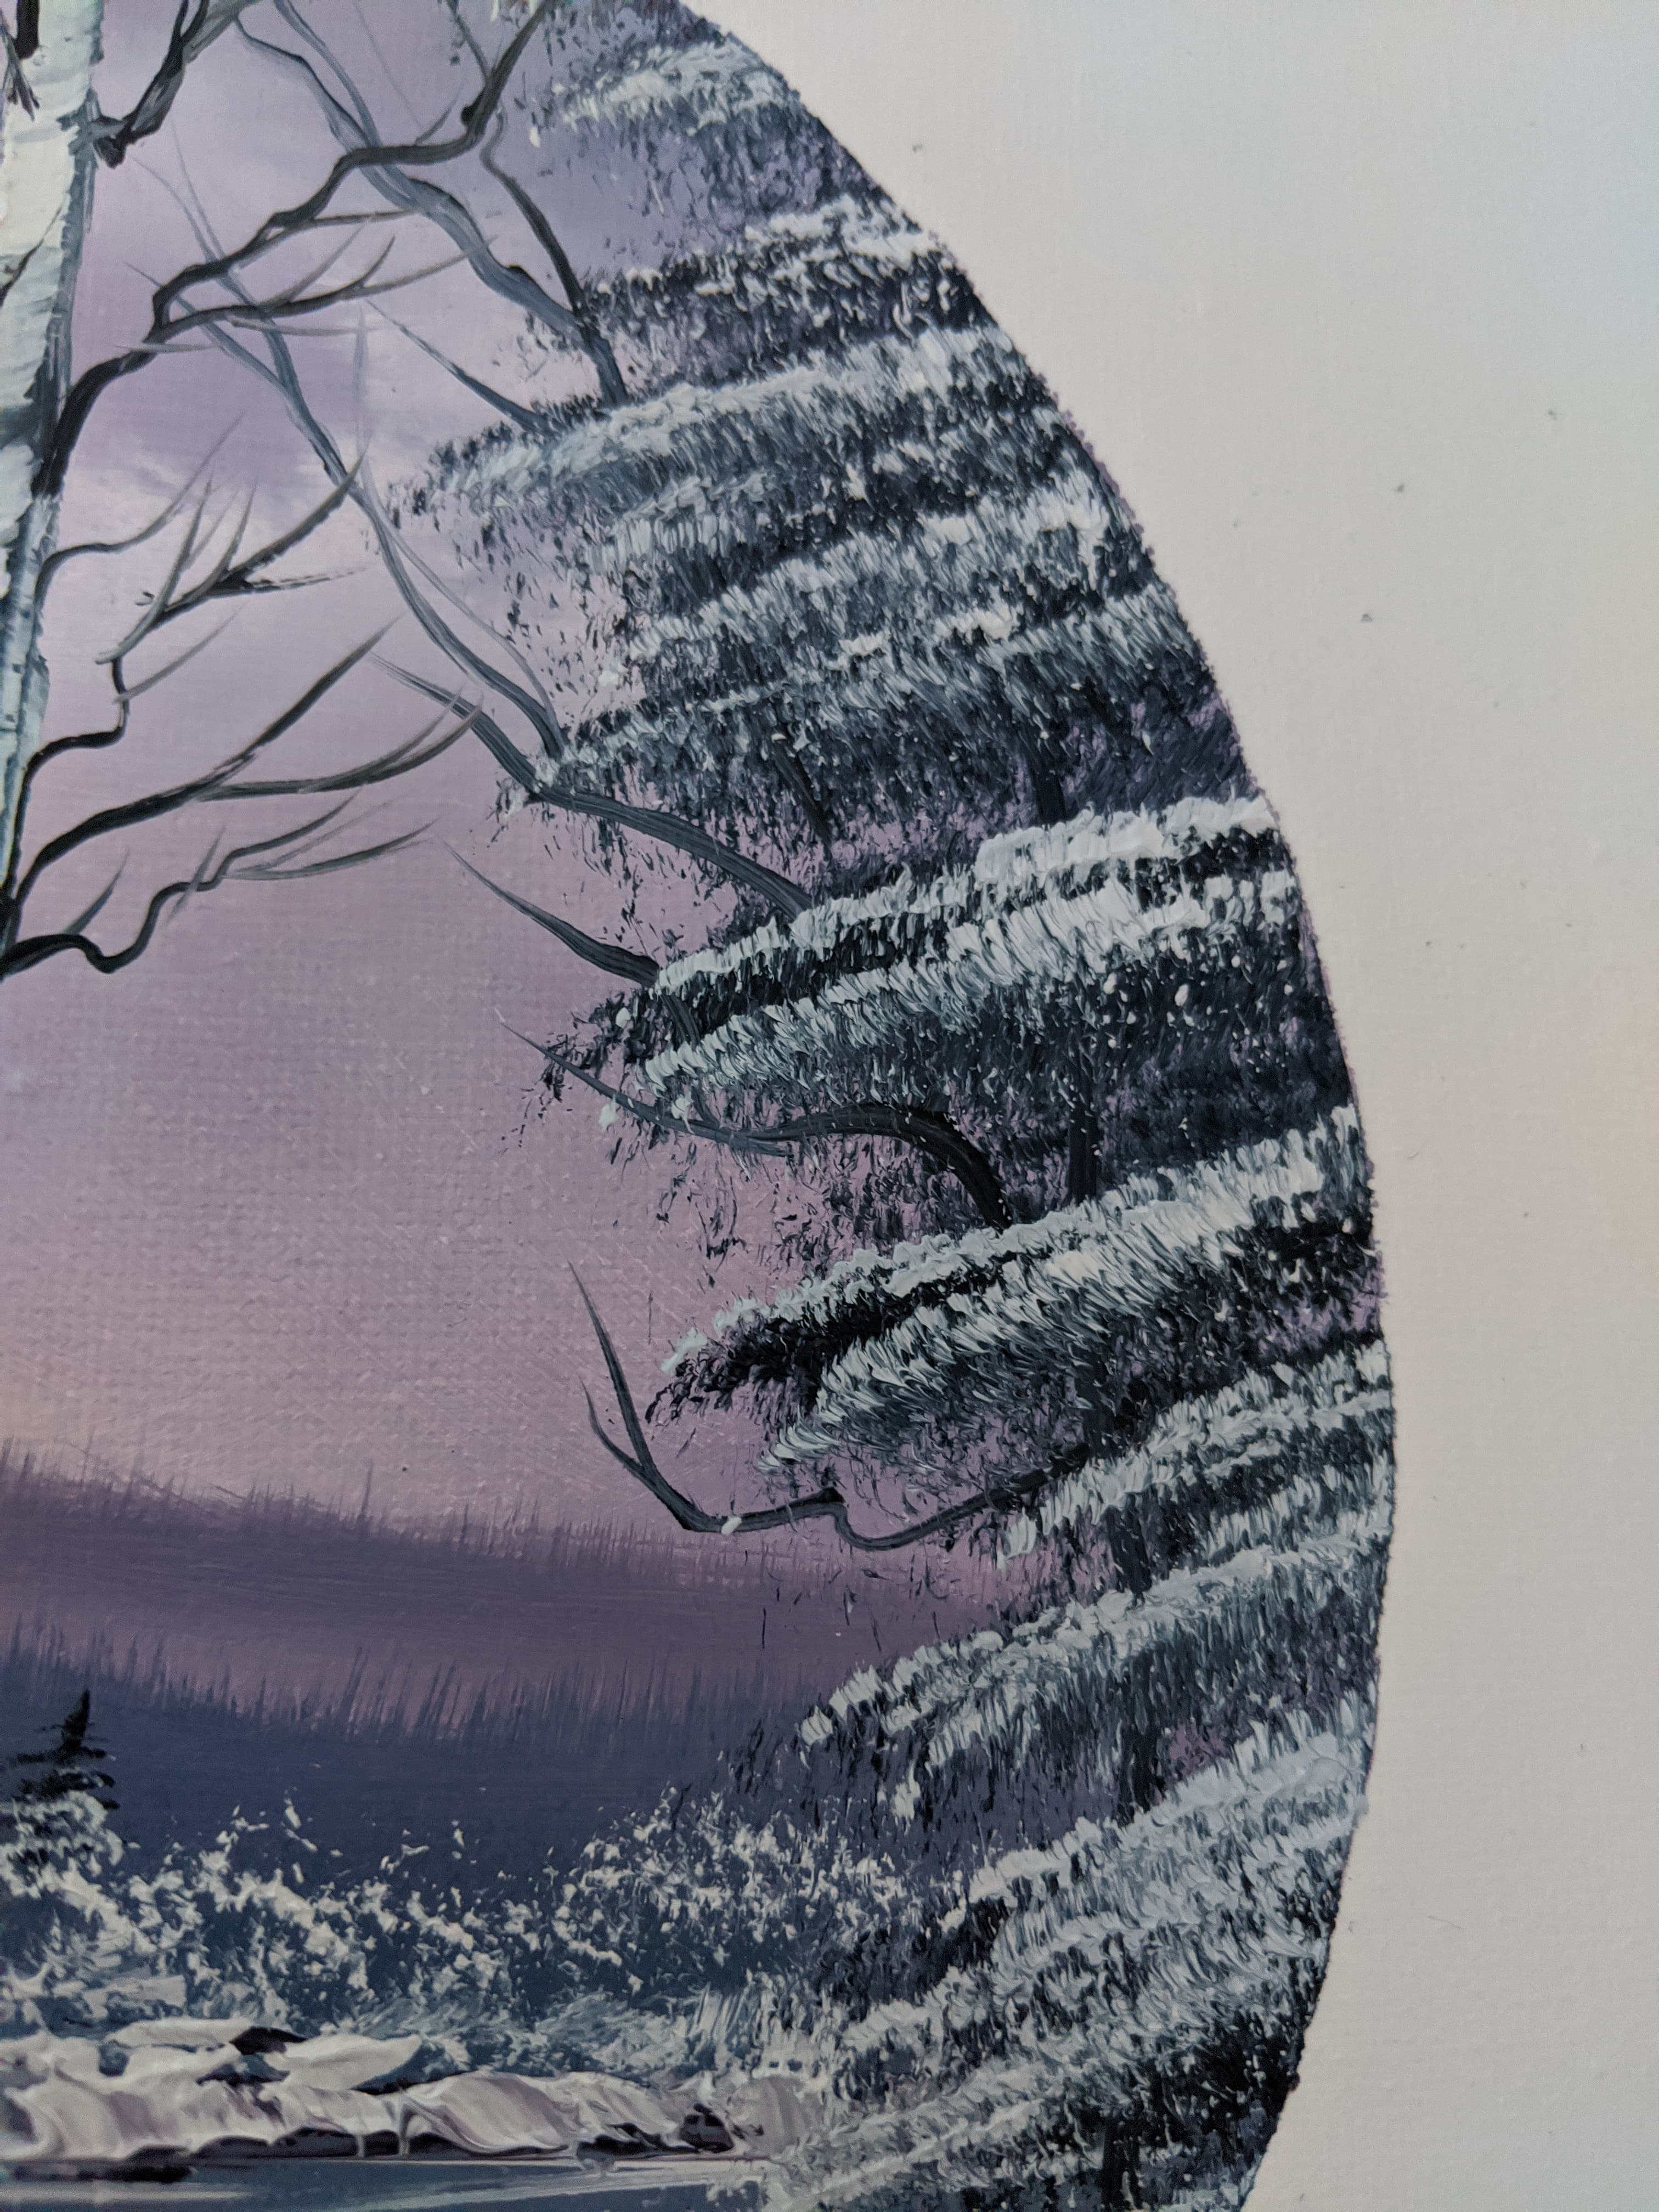
Snowy highlights
I'd like to preface this section by mentioning the following: Do not be so stingy with the paint! I am guilty of this. Oil paints aren't cheap and I am often hesitant to add a lot of paint to my brush. However, this is essential in order to add highlights to bushes or make grassy/bushy areas stick (this applies to making greenish/yellow highlights for non-winter scenes as well). It takes a surprisingly large amount of paint to get highlights to stick properly. This time around, I used Van Gogh brand titanium white. I found it to be nice and thick and ideal for what I was trying to achieve. I thinned it out with a bit of liquid white when doing the highlights and snowy bushy areas. I loaded my one inch brush with a lot of paint until the bristles effectively 'stuck together,' bringing the brush to a nice sharp point. I then gently used the corner to add the tree and bush highlights. It isn't easy. You can see a few places here where I slipped. The point is to lightly 'tap' the brush, trying as hard as possible not to let it slide. When tapping your brush into the paint on your palette, give it a little 'slide' or 'push,' just like Bob does. What happens is you'll create this little ridge of paint on your palette that also exists on the edge of your brush. This is what you'll be gently adding to your canvas over the dark color already there. Also, do not be afraid to reload your brush often and wipe your brush on a paper towel if it happens to pick up that under color so you don't dilute and darken your highlight color.

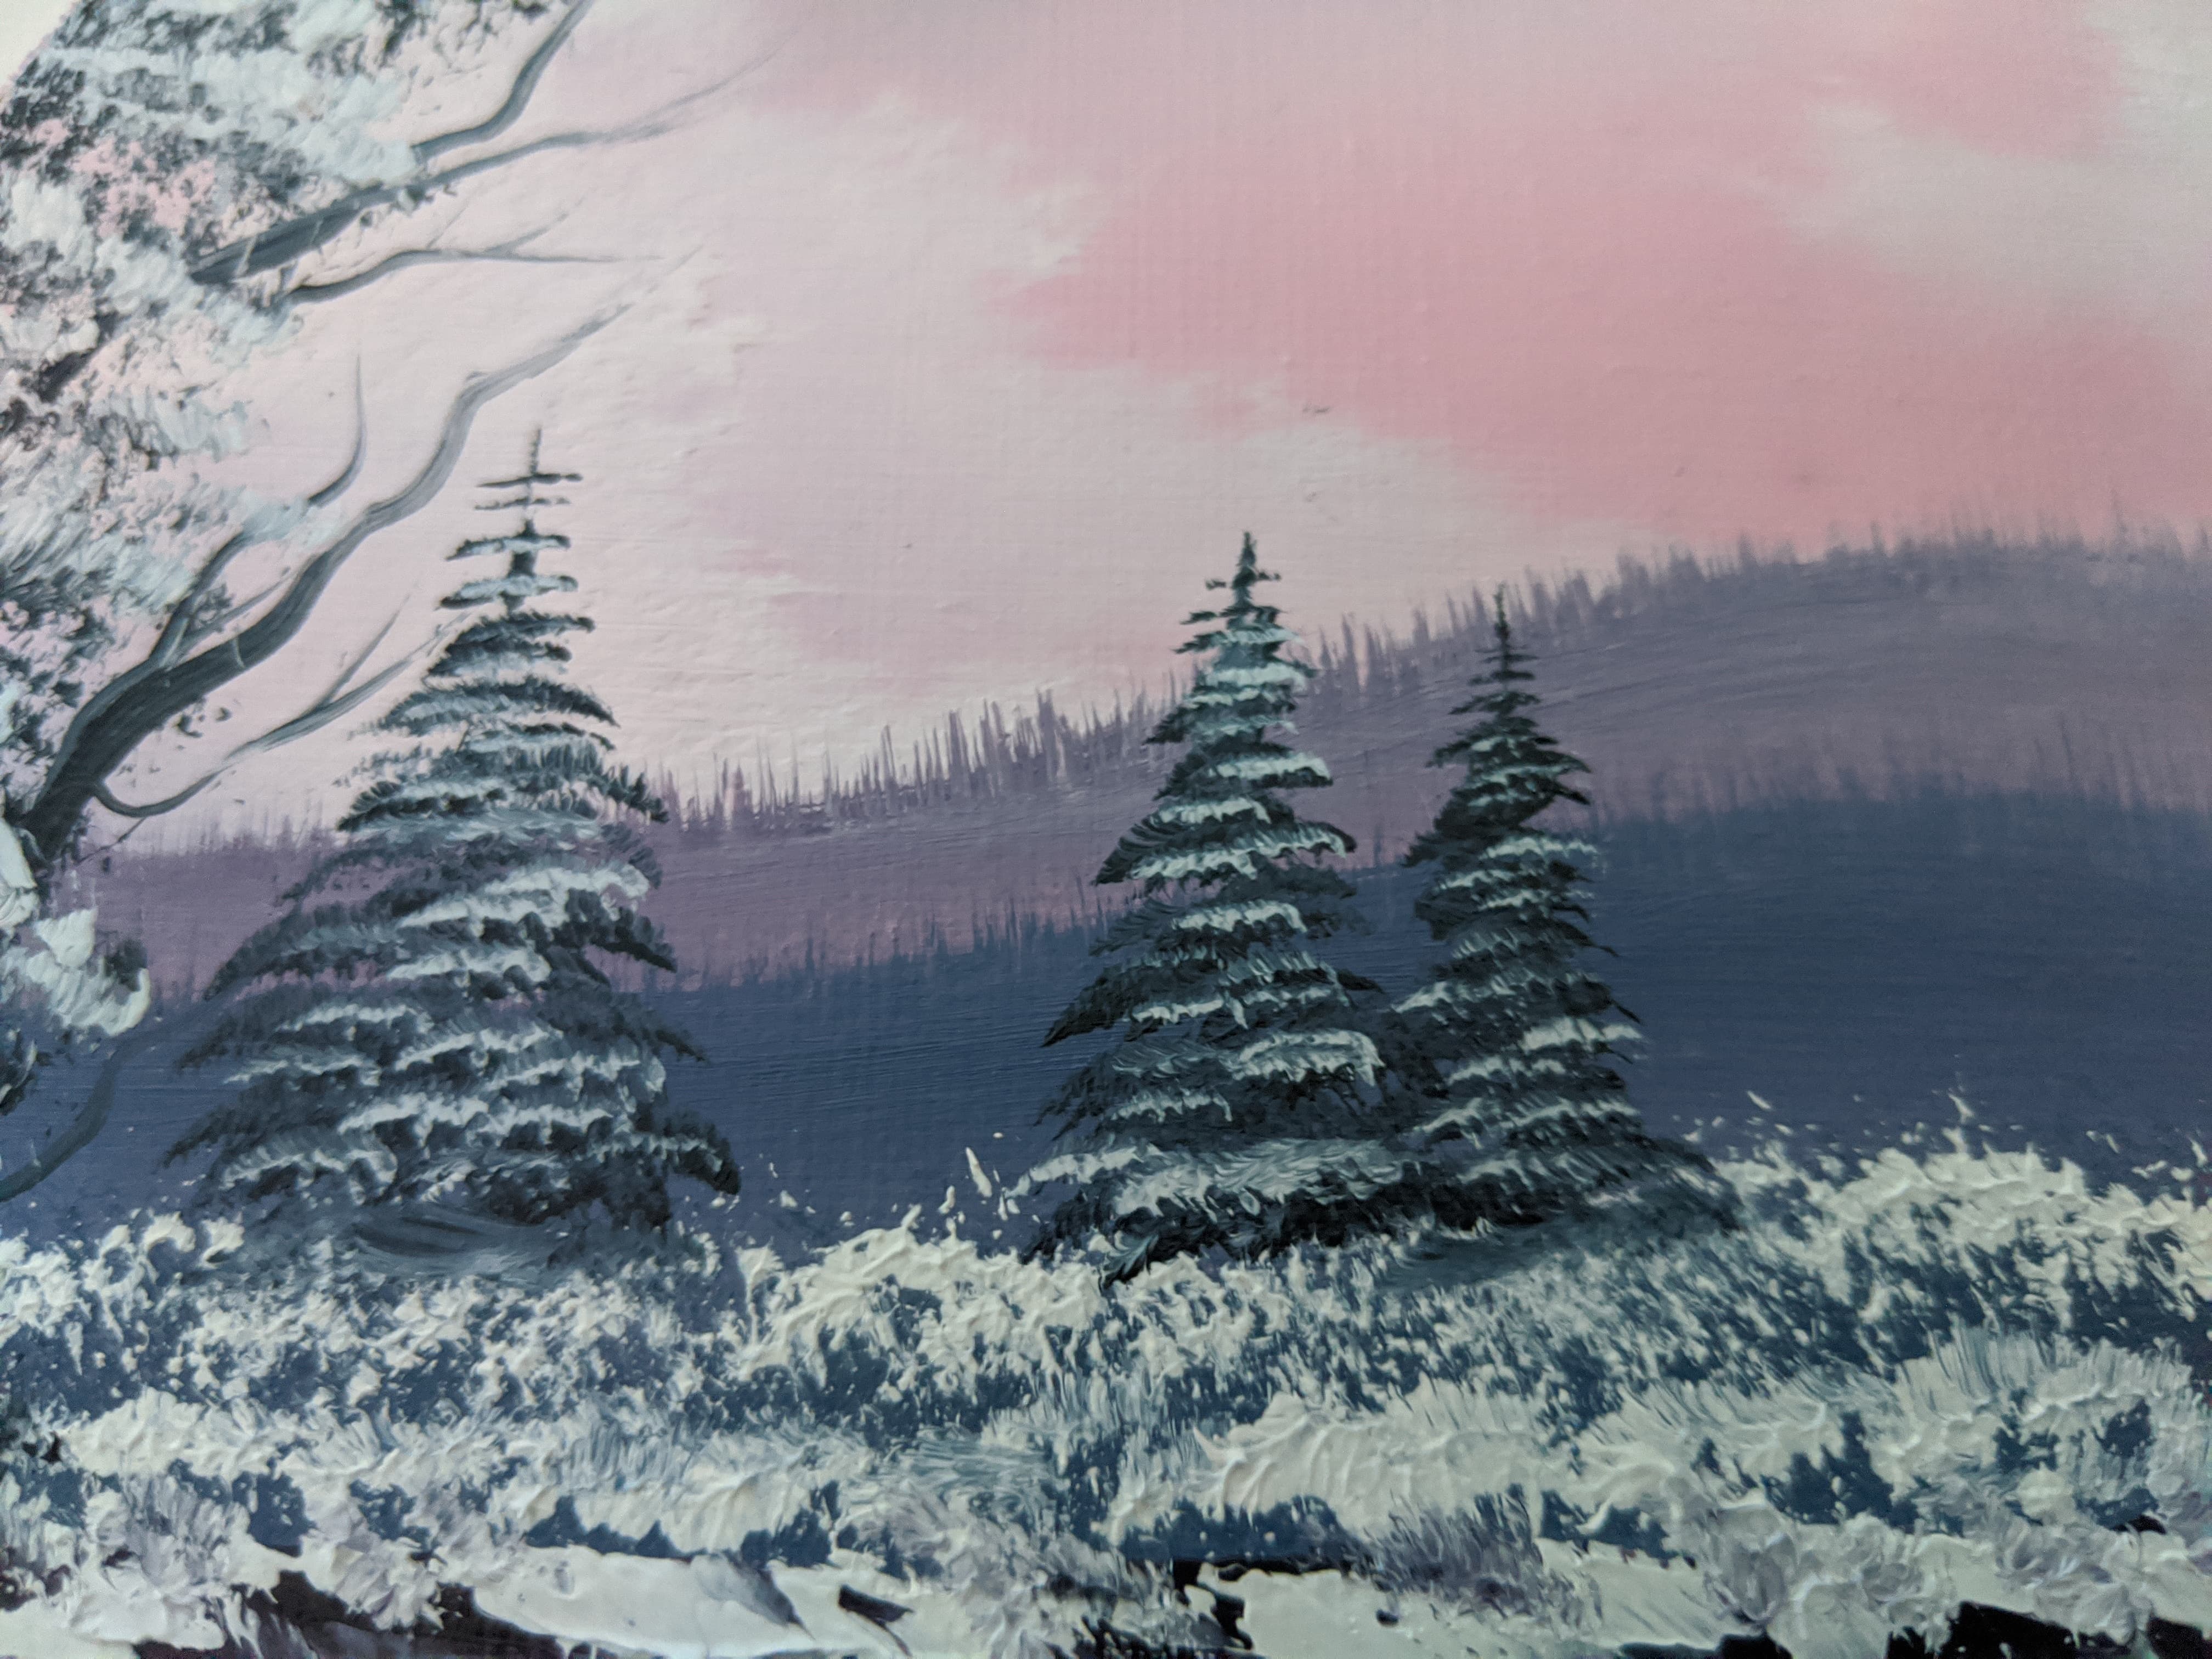
Distant evergreen detail
I used a new, non-Ross brand brush to make the distant evergreens. Despite it being a 'cheap' dollar store brush, I find it has the ability to create nice little detailed distant evergreens. It also looks like snow is hanging off the branches. I find it much easier to make distant, smaller evergreens with this brush compared to the fan brush. I used a tiny amount of thinner in the dark color just to help the base color of the evergreens to stick. I then used a thin white (titanium white + liquid white) in order to get the snowy highlights to stick properly.
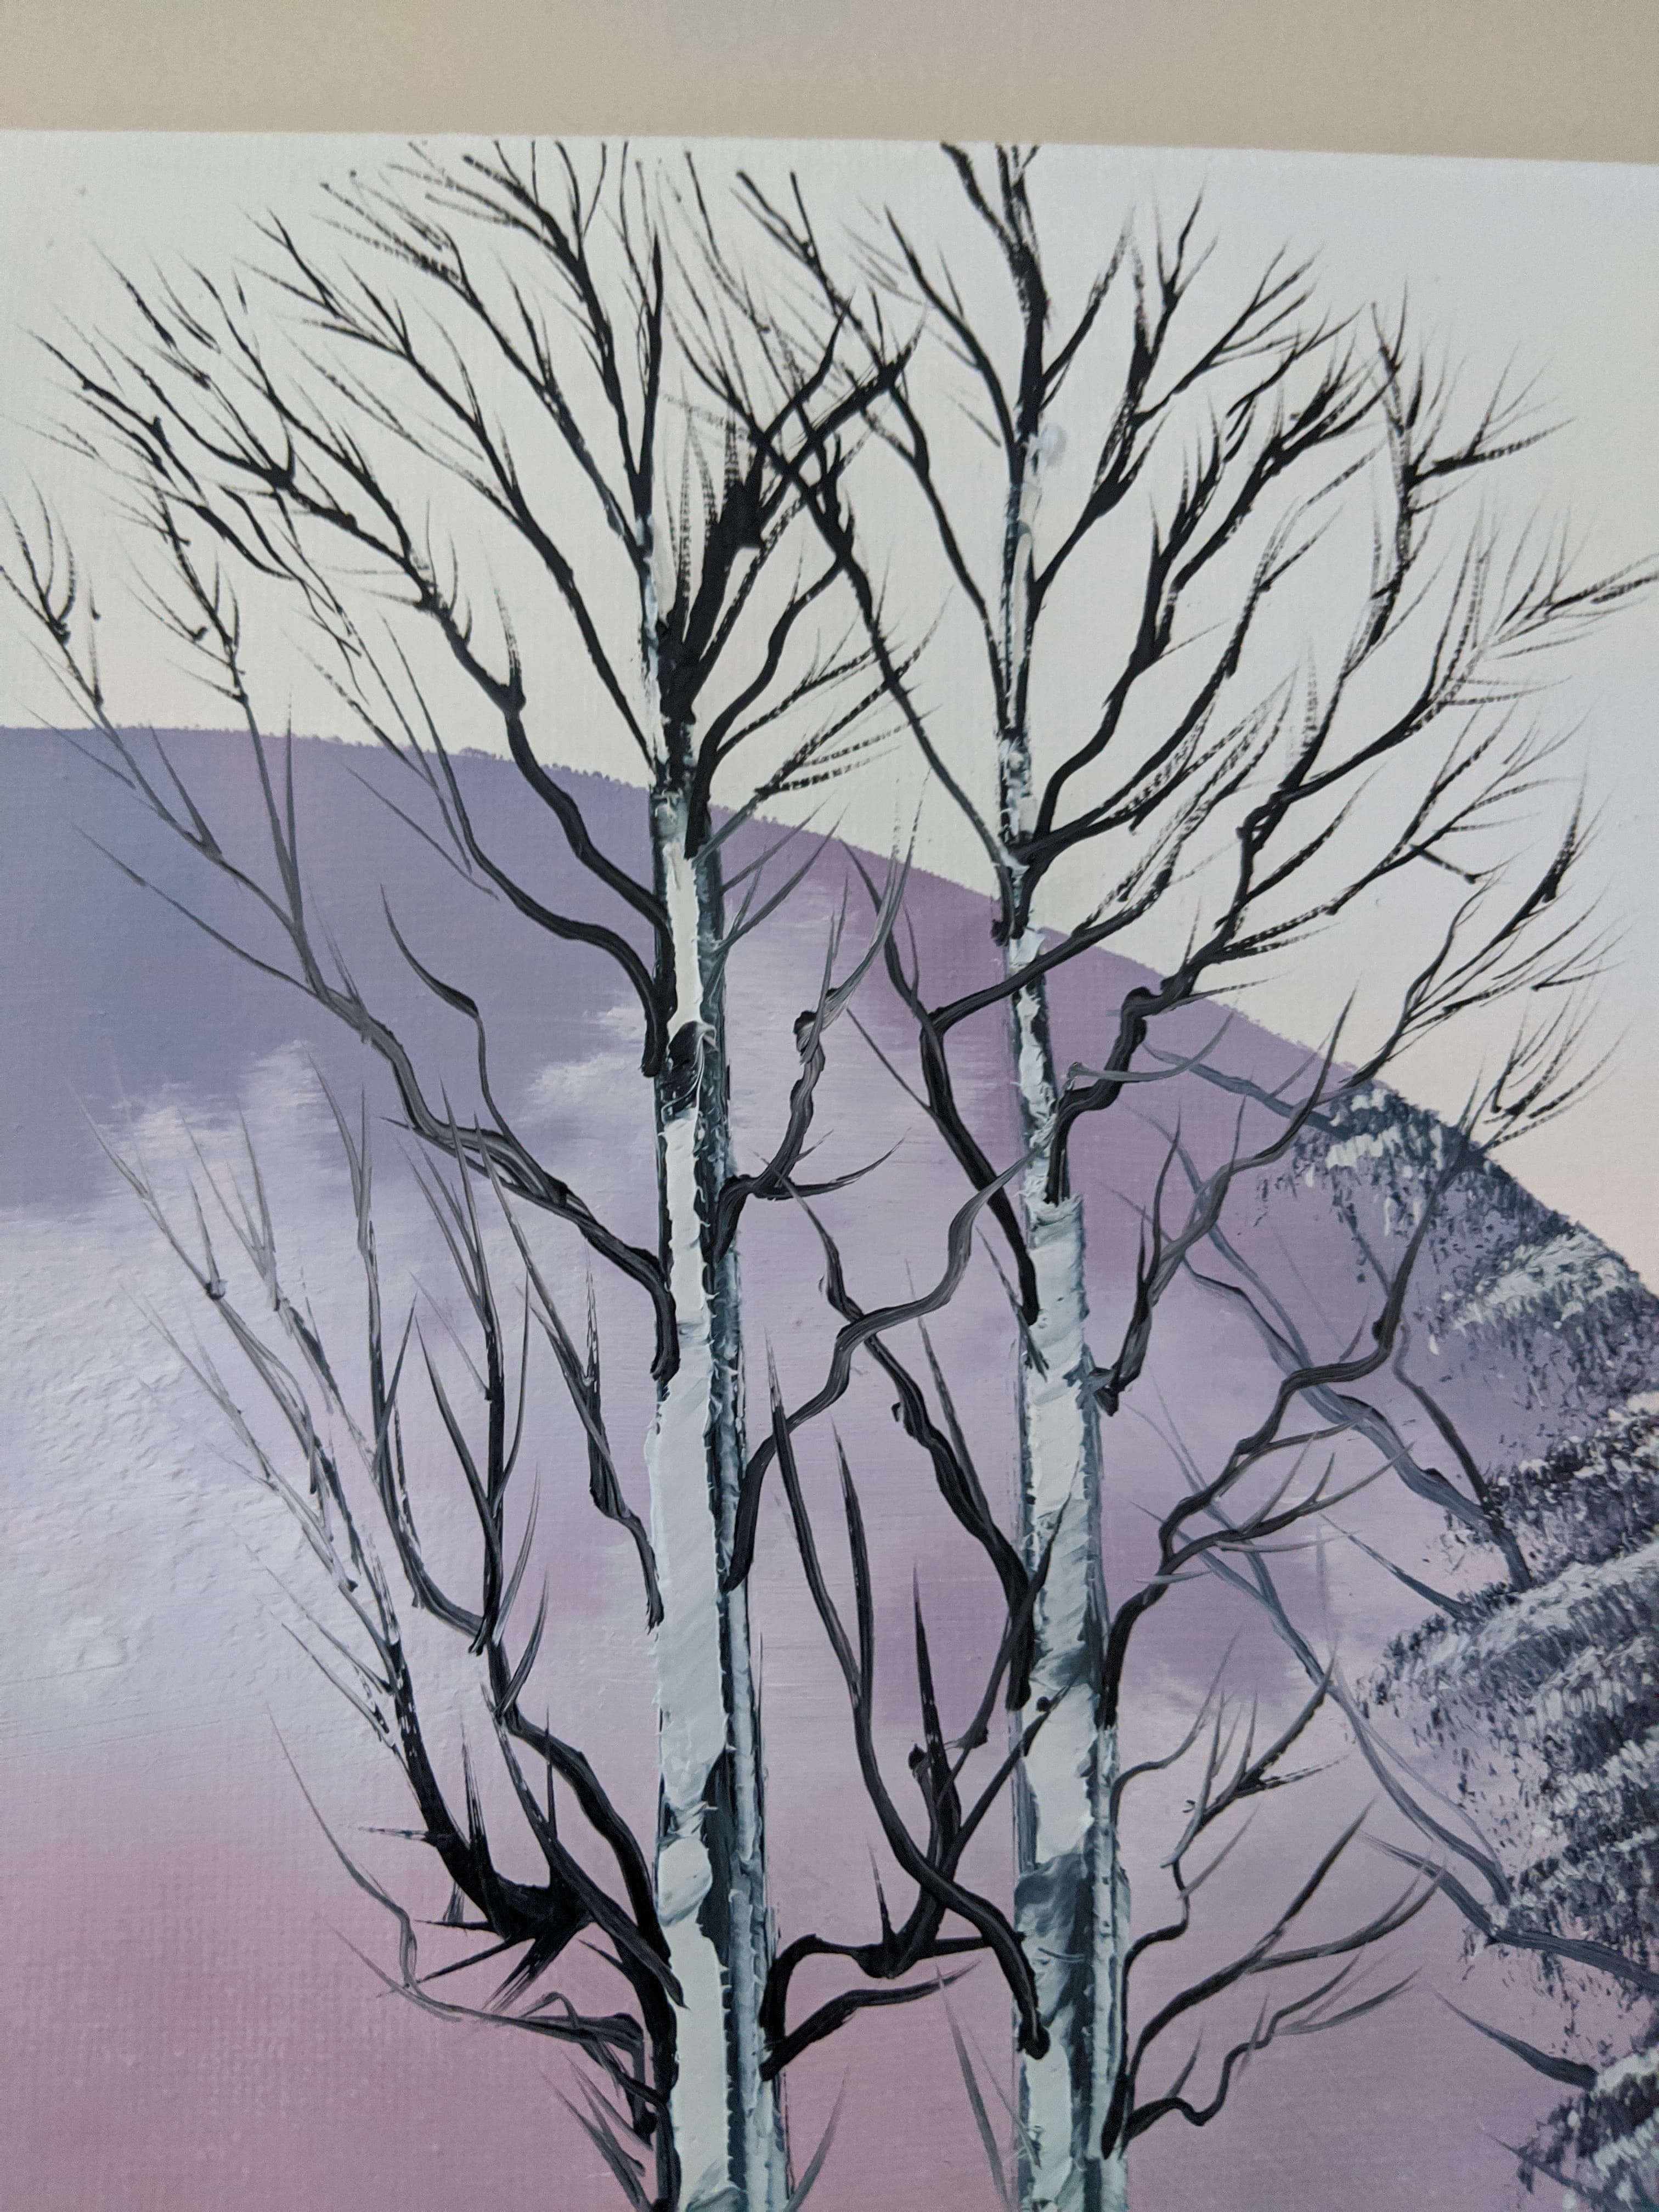
Tree branches with the liner brush(es)
I used both a newly purchased Ross brand liner brush (my other one split) as well as a smaller liner brush to make the tree limbs pictured below. For this, I used pure liquid black. I always have a hard time figuring out just how much thinner I need to add to my brown paint in order to make delicate limbs. With the liquid black, you just throw some on your palette and run your liner brush through it. I will say one thing, however - even the liquid black may not be thin enough at times. It depends what you're painting over. If you find it won't flow properly, you can add a few drops of thinner to the liquid black to make it even thinner.
Overall, that was my entire process in creating this painting. As I mentioned above, it's a nice and simple painting and I would highly recommend it. I would also recommend experimenting with different brushes and methods. For example, Steve Ross used a fan brush to paint in the distant hills, where Bob would often tap a one or two inch brush to make the same kind of hills. I much preferred just painting in a smooth hill and then 'lifting' the tips up with the fan brush to create all those distant tree shapes. It's all about experimentation to figure out what works best for you. Initially, I was trying to go about painting 100% the way Bob was in the particular episode I was watching. Once I decided to go about it my own way, painting really opened up, became simpler, and much more enjoyable.
I hope this article was helpful to some. Let me take this opportunity to wish everyone all the best in their painting endeavours, and please do not hesitate to ask any questions you may have.
-Lightsnow
Thank you for this very detailed article!