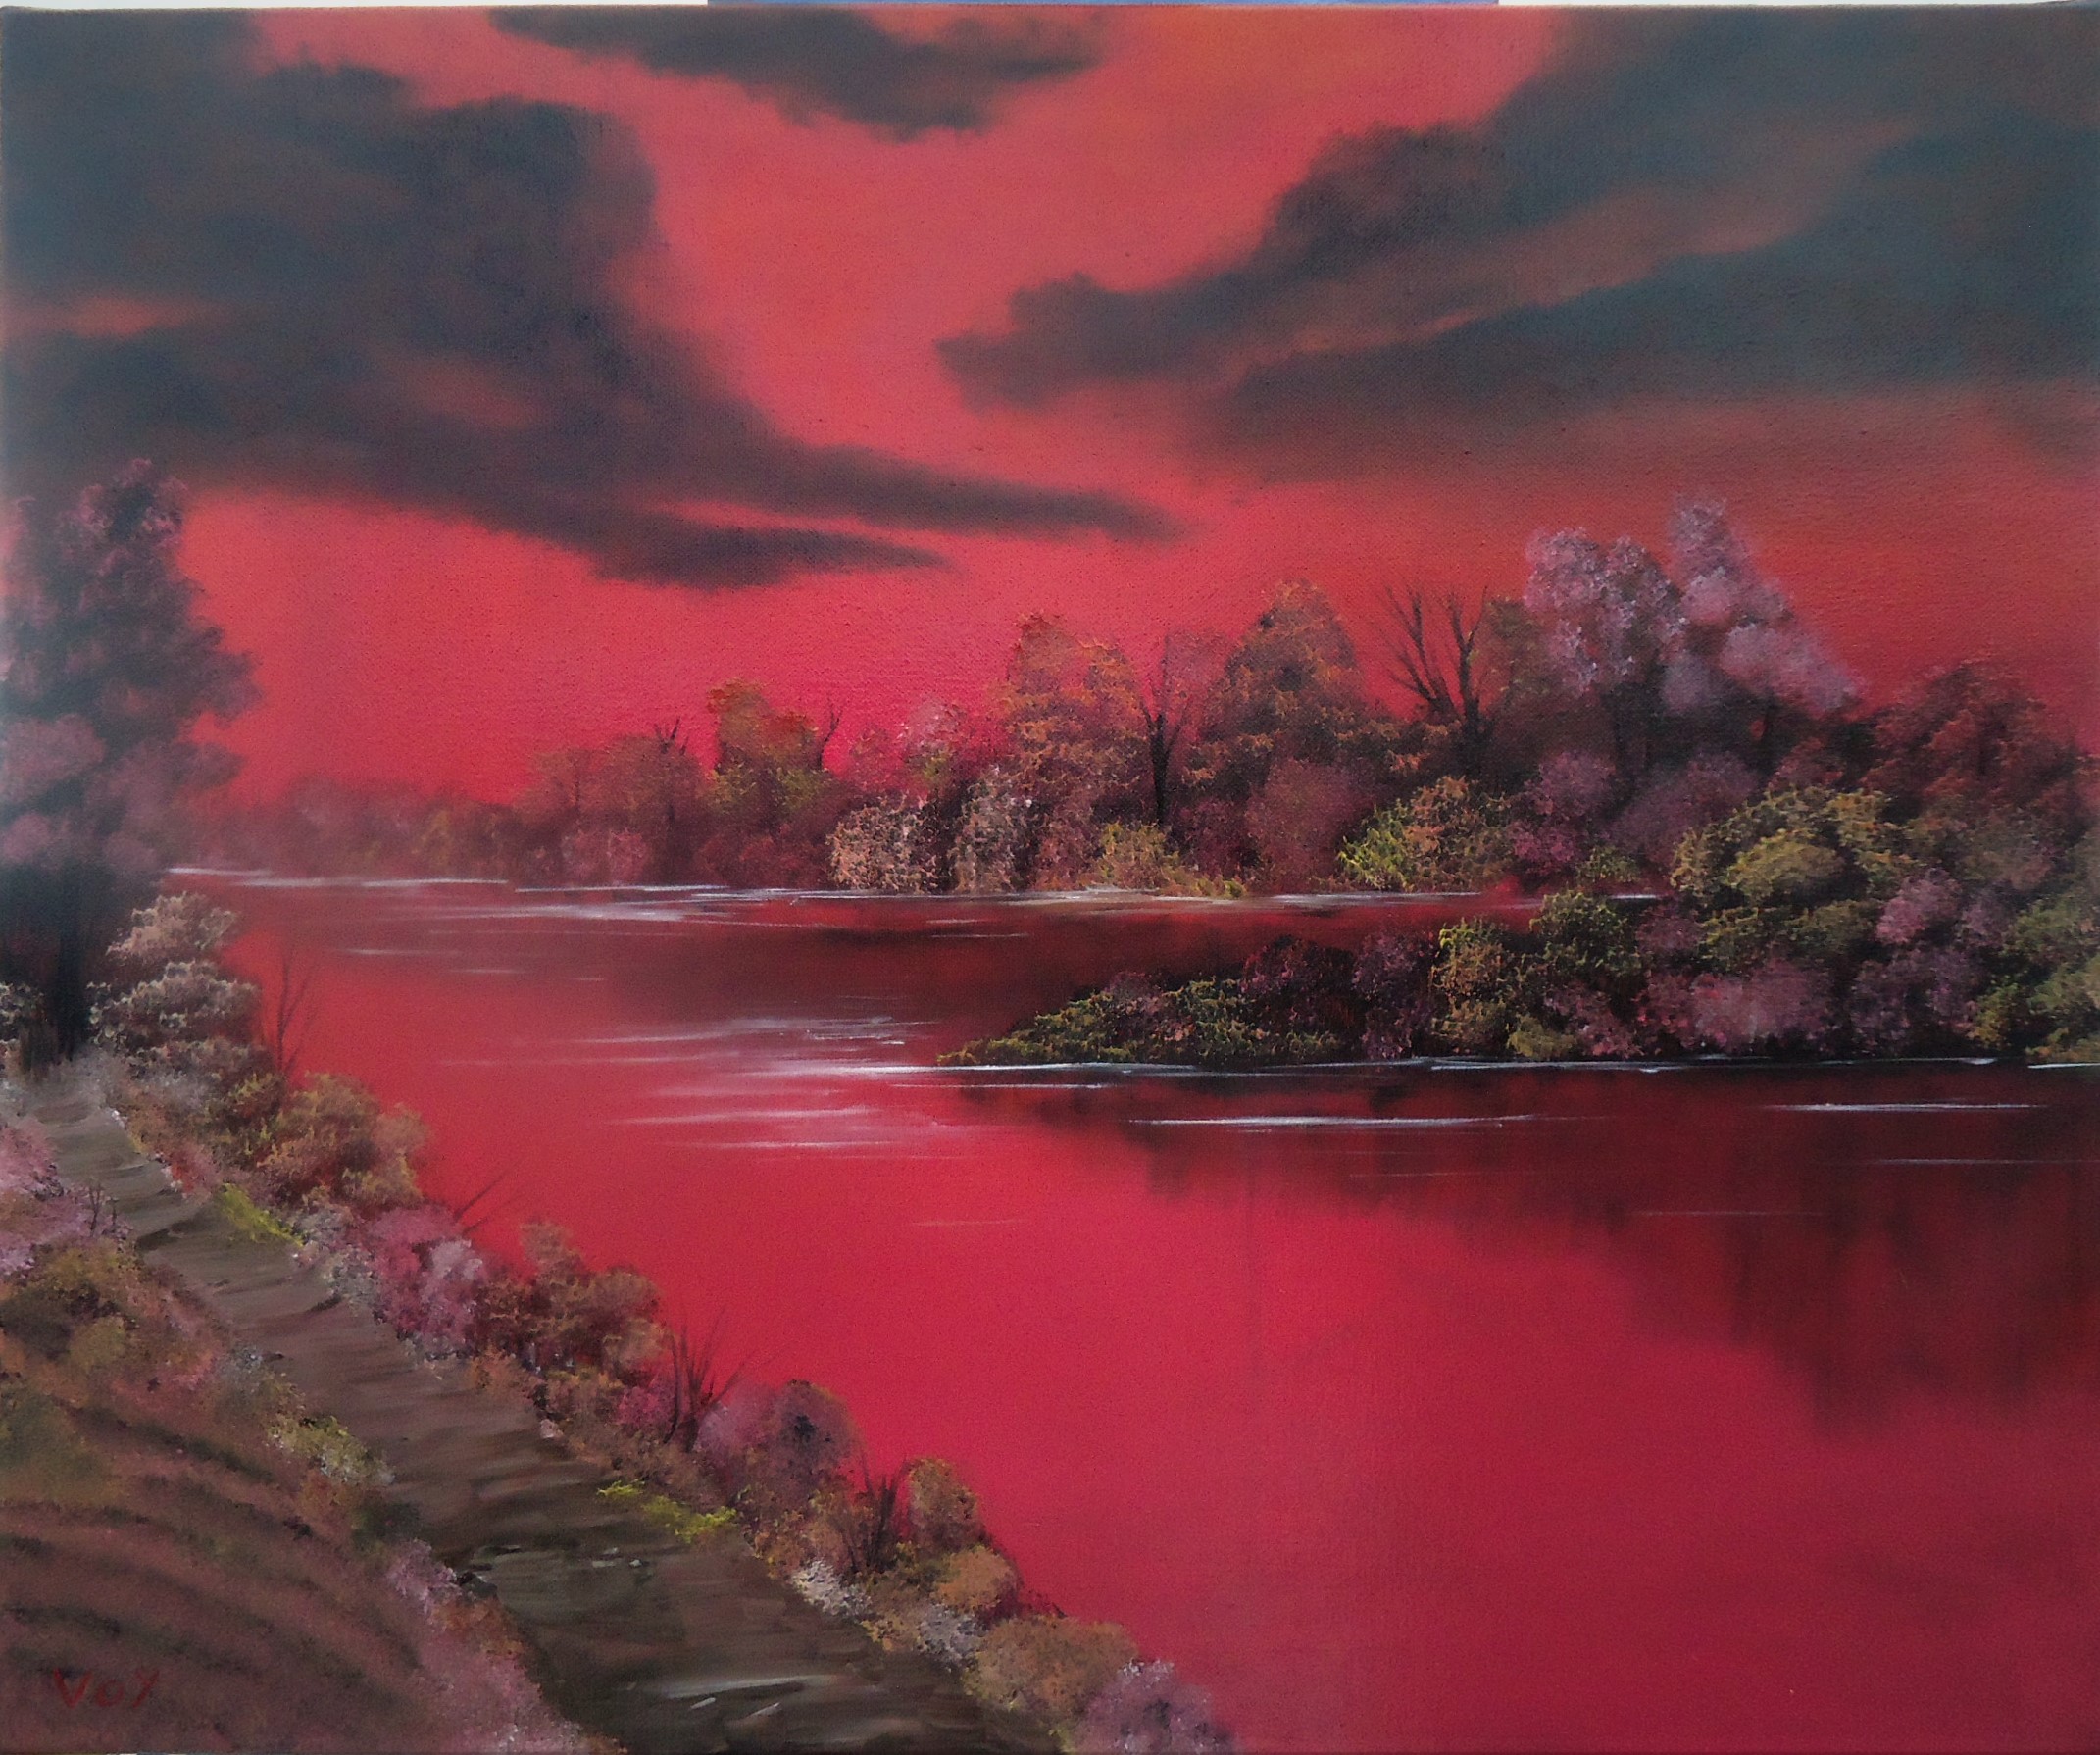
For a paint date with Doggymommee, I wrote the following helpful information about 'Fire Lake', from Briam, a CRI.
No worries, you have total freedom to use any of these or not, that's up to you. I agree that some might be useful, others perhaps not. Your call!
Colours:
* Cadmium red (bright red).
* Titanium white.
* Ivory black (or midnight black).
* VDBrown.
* Dark Sienna (or burnt umber).
* Indian yellow.
* Cadmium yellow.
* Yellow ochre.
* Liquid white, liquid clear (only to be used if you want the sky and water deep red and the overal colours hard).
Tools:
* 2 inch and/or one inch brushes.
* Oval or foliage brush (optional).
* Fan brush number 3.
* Script liner.
* Palet knife.
The painting itself consists of:
* The sky.
* Back land strip with bushes/trees.
* 1st layer of water.
* Medium (smaller) land strip with bushes/trees.
* 2nd layer of water.
* Front land strip with bushes/trees and a path.
* The signature.
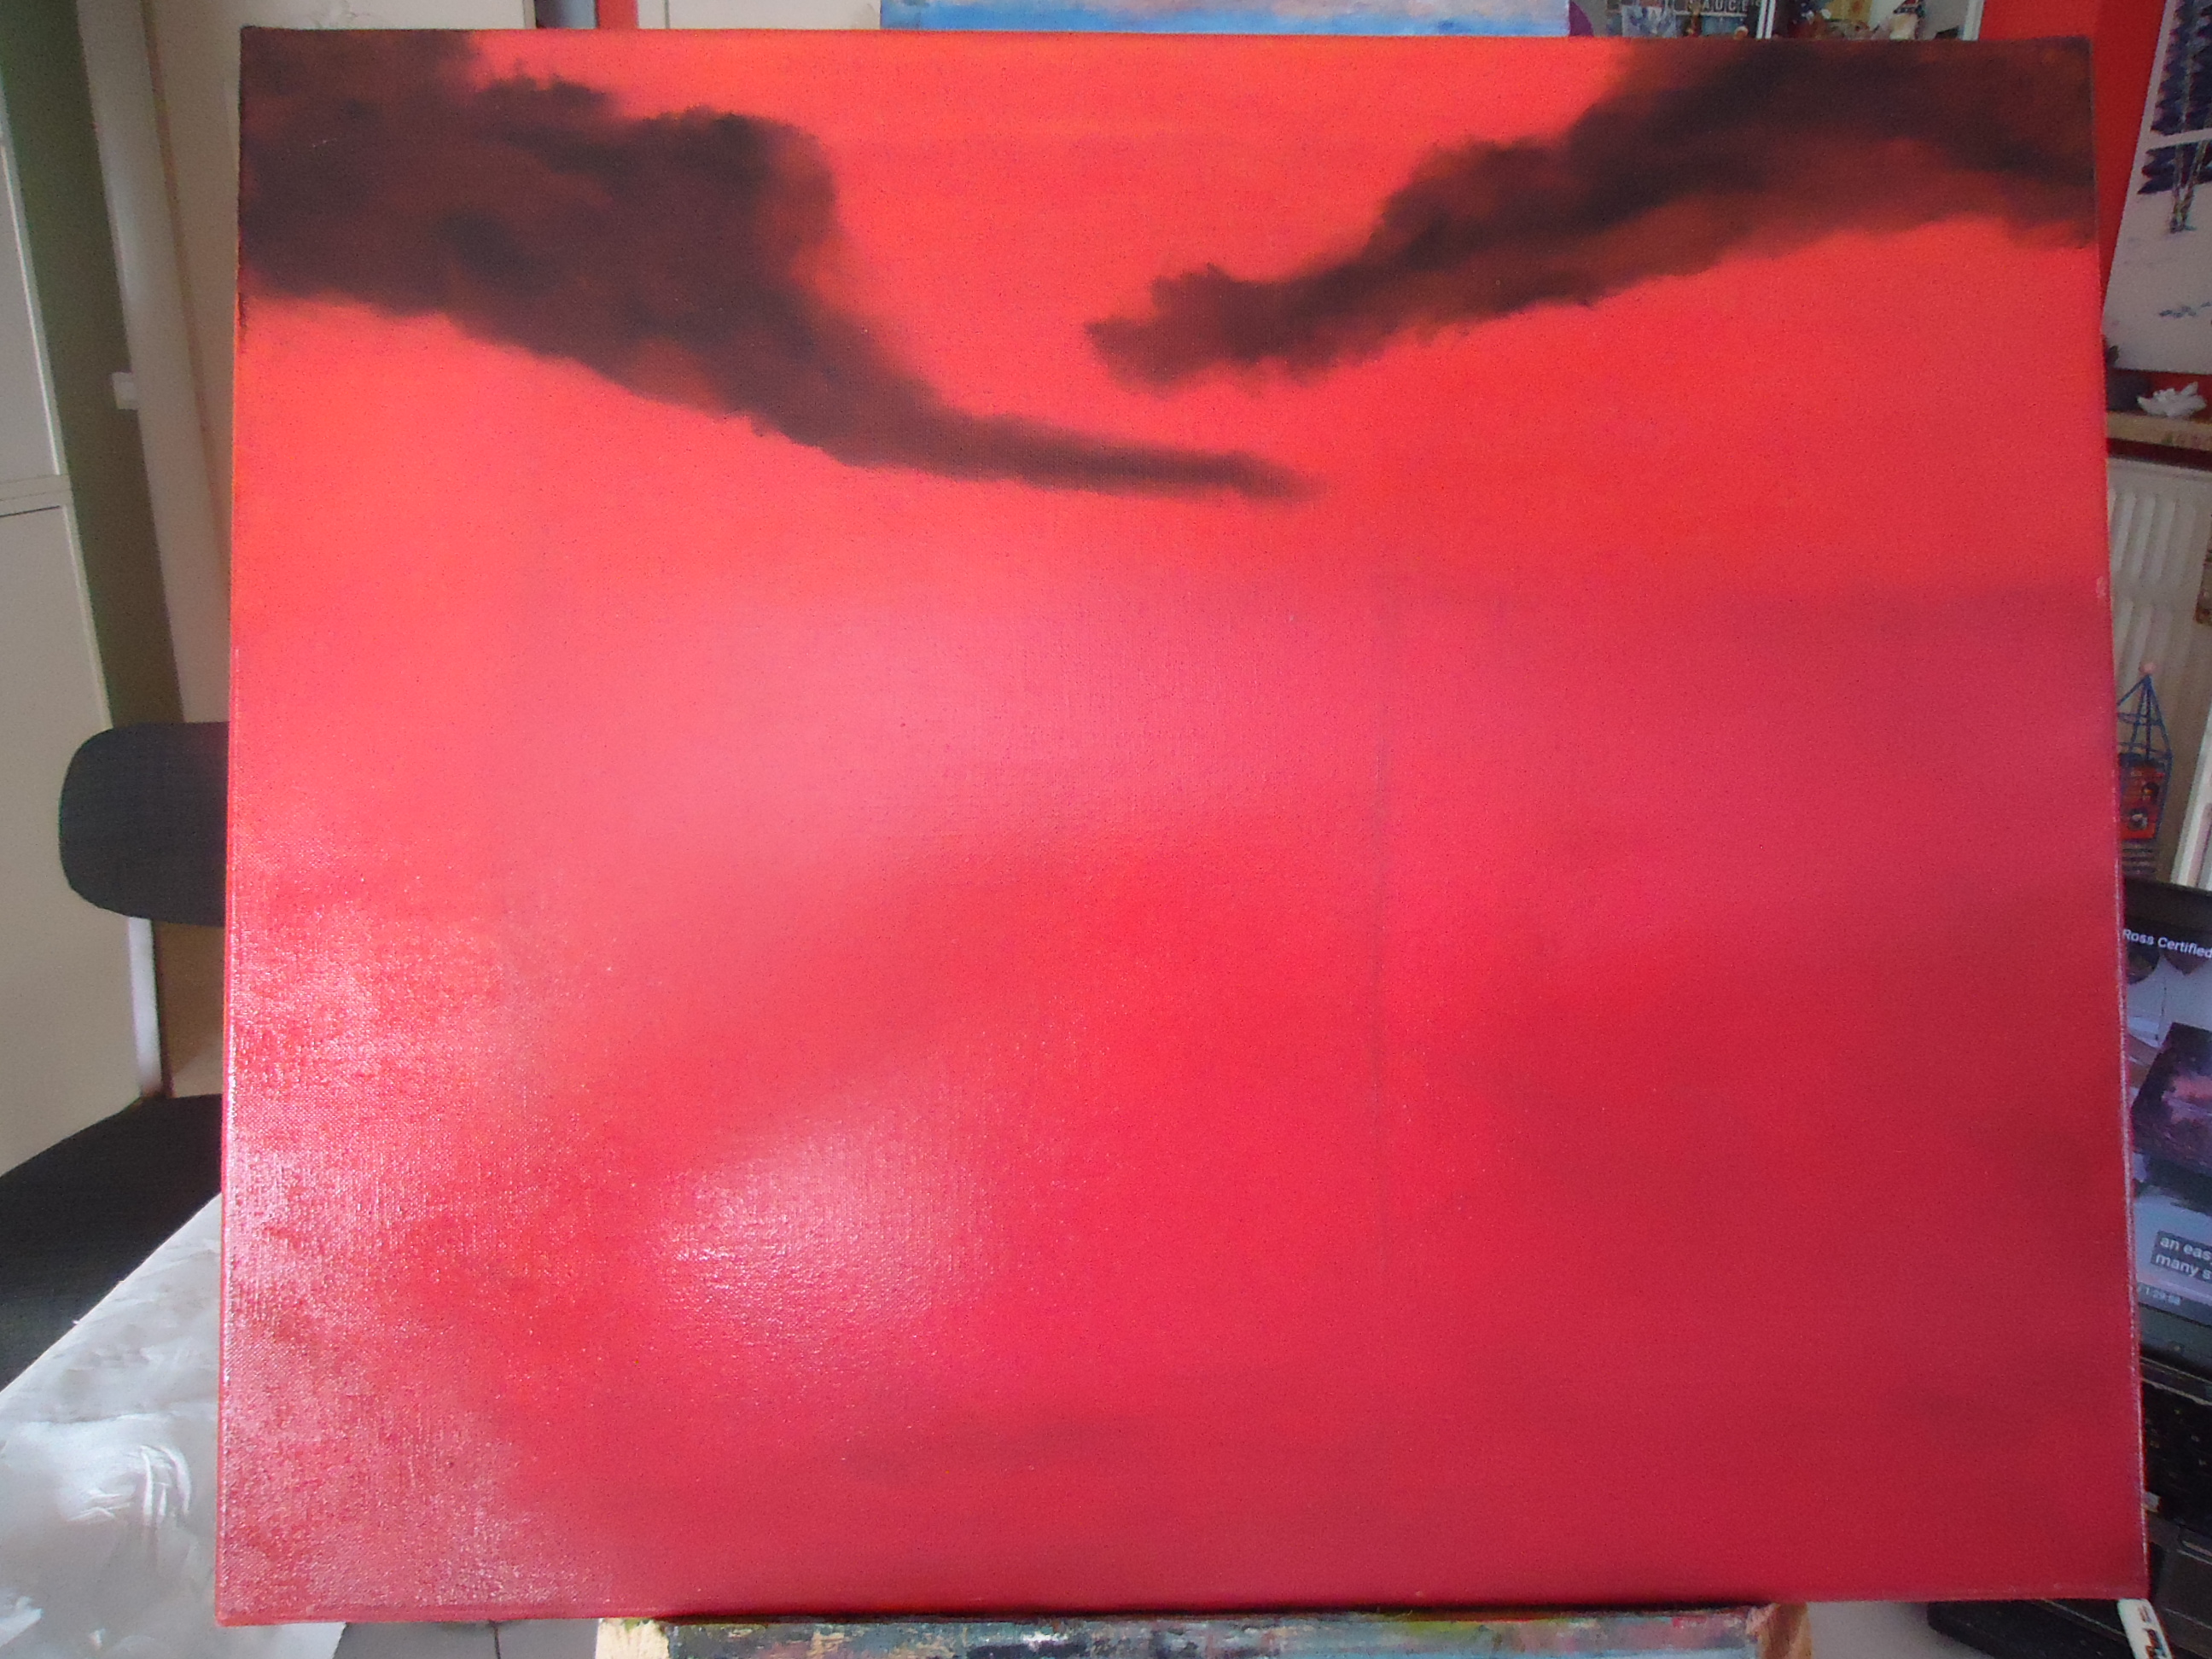
1. The sky:
Mixture of 85% cad red with 15% T-white, or your own mix up to your liking. Spread it around with a 2 inch or a one inch all over the entire canvas. This does NOT need a perfect smooth colour surface, some hints of reddish white or deeper red may still be visible.
Clouds are done with black and a fan brush to swirl the clouds in. Personally, I used a one inch since I prefer tamponing iso swirling (I get better clouds that way!). VERY gently remove the paint remains and stripes with a 2 inch or a one inch. If preferred, you might add a little white at the bottom of the clouds and also gently swipe this colour in.
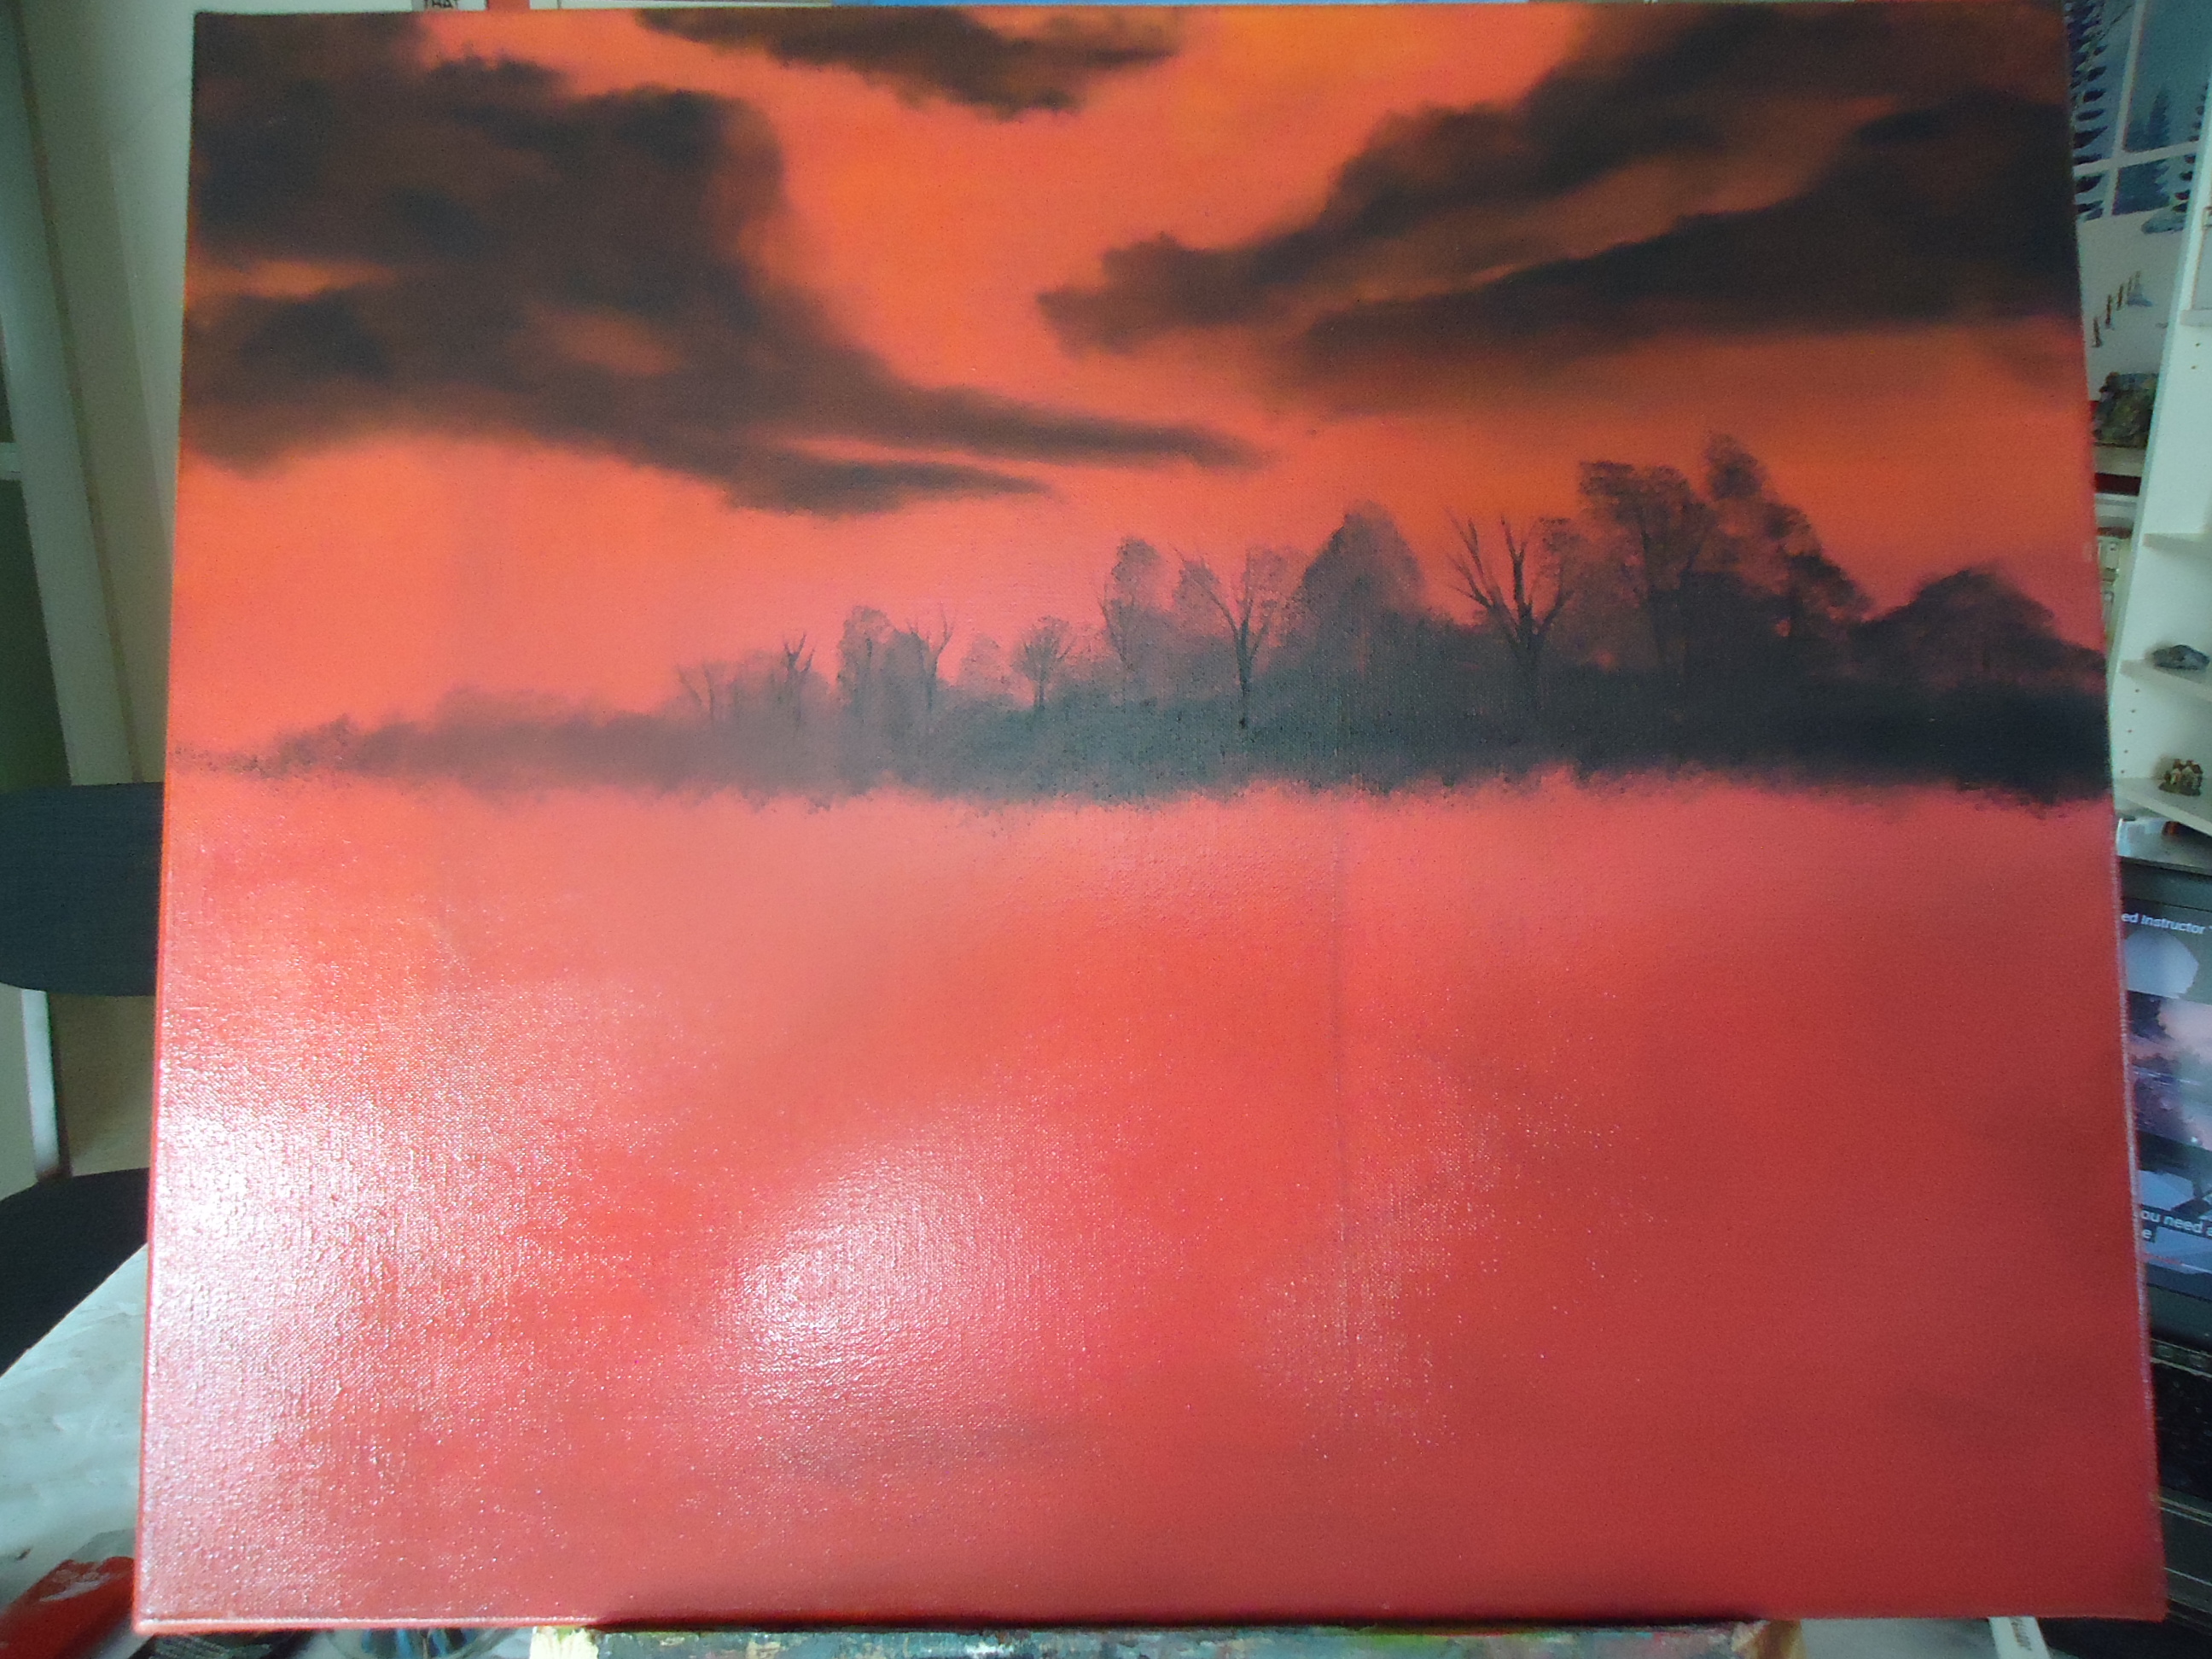
2. Back land strip with bushes/trees:
With a little black, tap bushes/trees shapes in with an oval or a 1 inch brush (top only!). Form a row of bushes/trees as horizontal as possible (TOP half of the canvas), giving the bushes all shapes and sizes. Scratch in some tiny tree trunks and branches with the knife, here and there. Don't overdo it. Add a few dead trees in it here and there with the liner brush and some thinned black paint.
Use the foliage, oval or one inch brush to create highlights (always use a side of the brush, never full!!). Use the red that you first gave a brighter, softer value with T-white or liquid white. It must be different then the reddish background, that's all! Gently tap or push it on the bushes/trees and form your foliage. Trees first, then the bottom bushes. Vary the colours (red, yellow, green (black and yellow), ochre) there but keep it darkened (shy), never too bright since this land strip is at the back of the painting.
3. 1st layer of water:
Take a 2 or a one inch brush and slide the bottom of the land strip downwards. Almost certain, you will have not enough black to strip down so you might need to put some extra on your brush first. MAKE sure those black stripes are 100% downwards AND that you have some value variation of the colour (lot or less black). So that when you stripe sideways with a CLEAN brush, you will see difference in the reflections and this will look more like water. Also pay attention to the depth of the stripes, the lower the bushes, the less deeper the stripes.
Use the palet knife and some liquid white to make very thin waterlines underneath the bushes. You can also add some in the water if desired (creates depth) but all need to be horizontal at all cost!
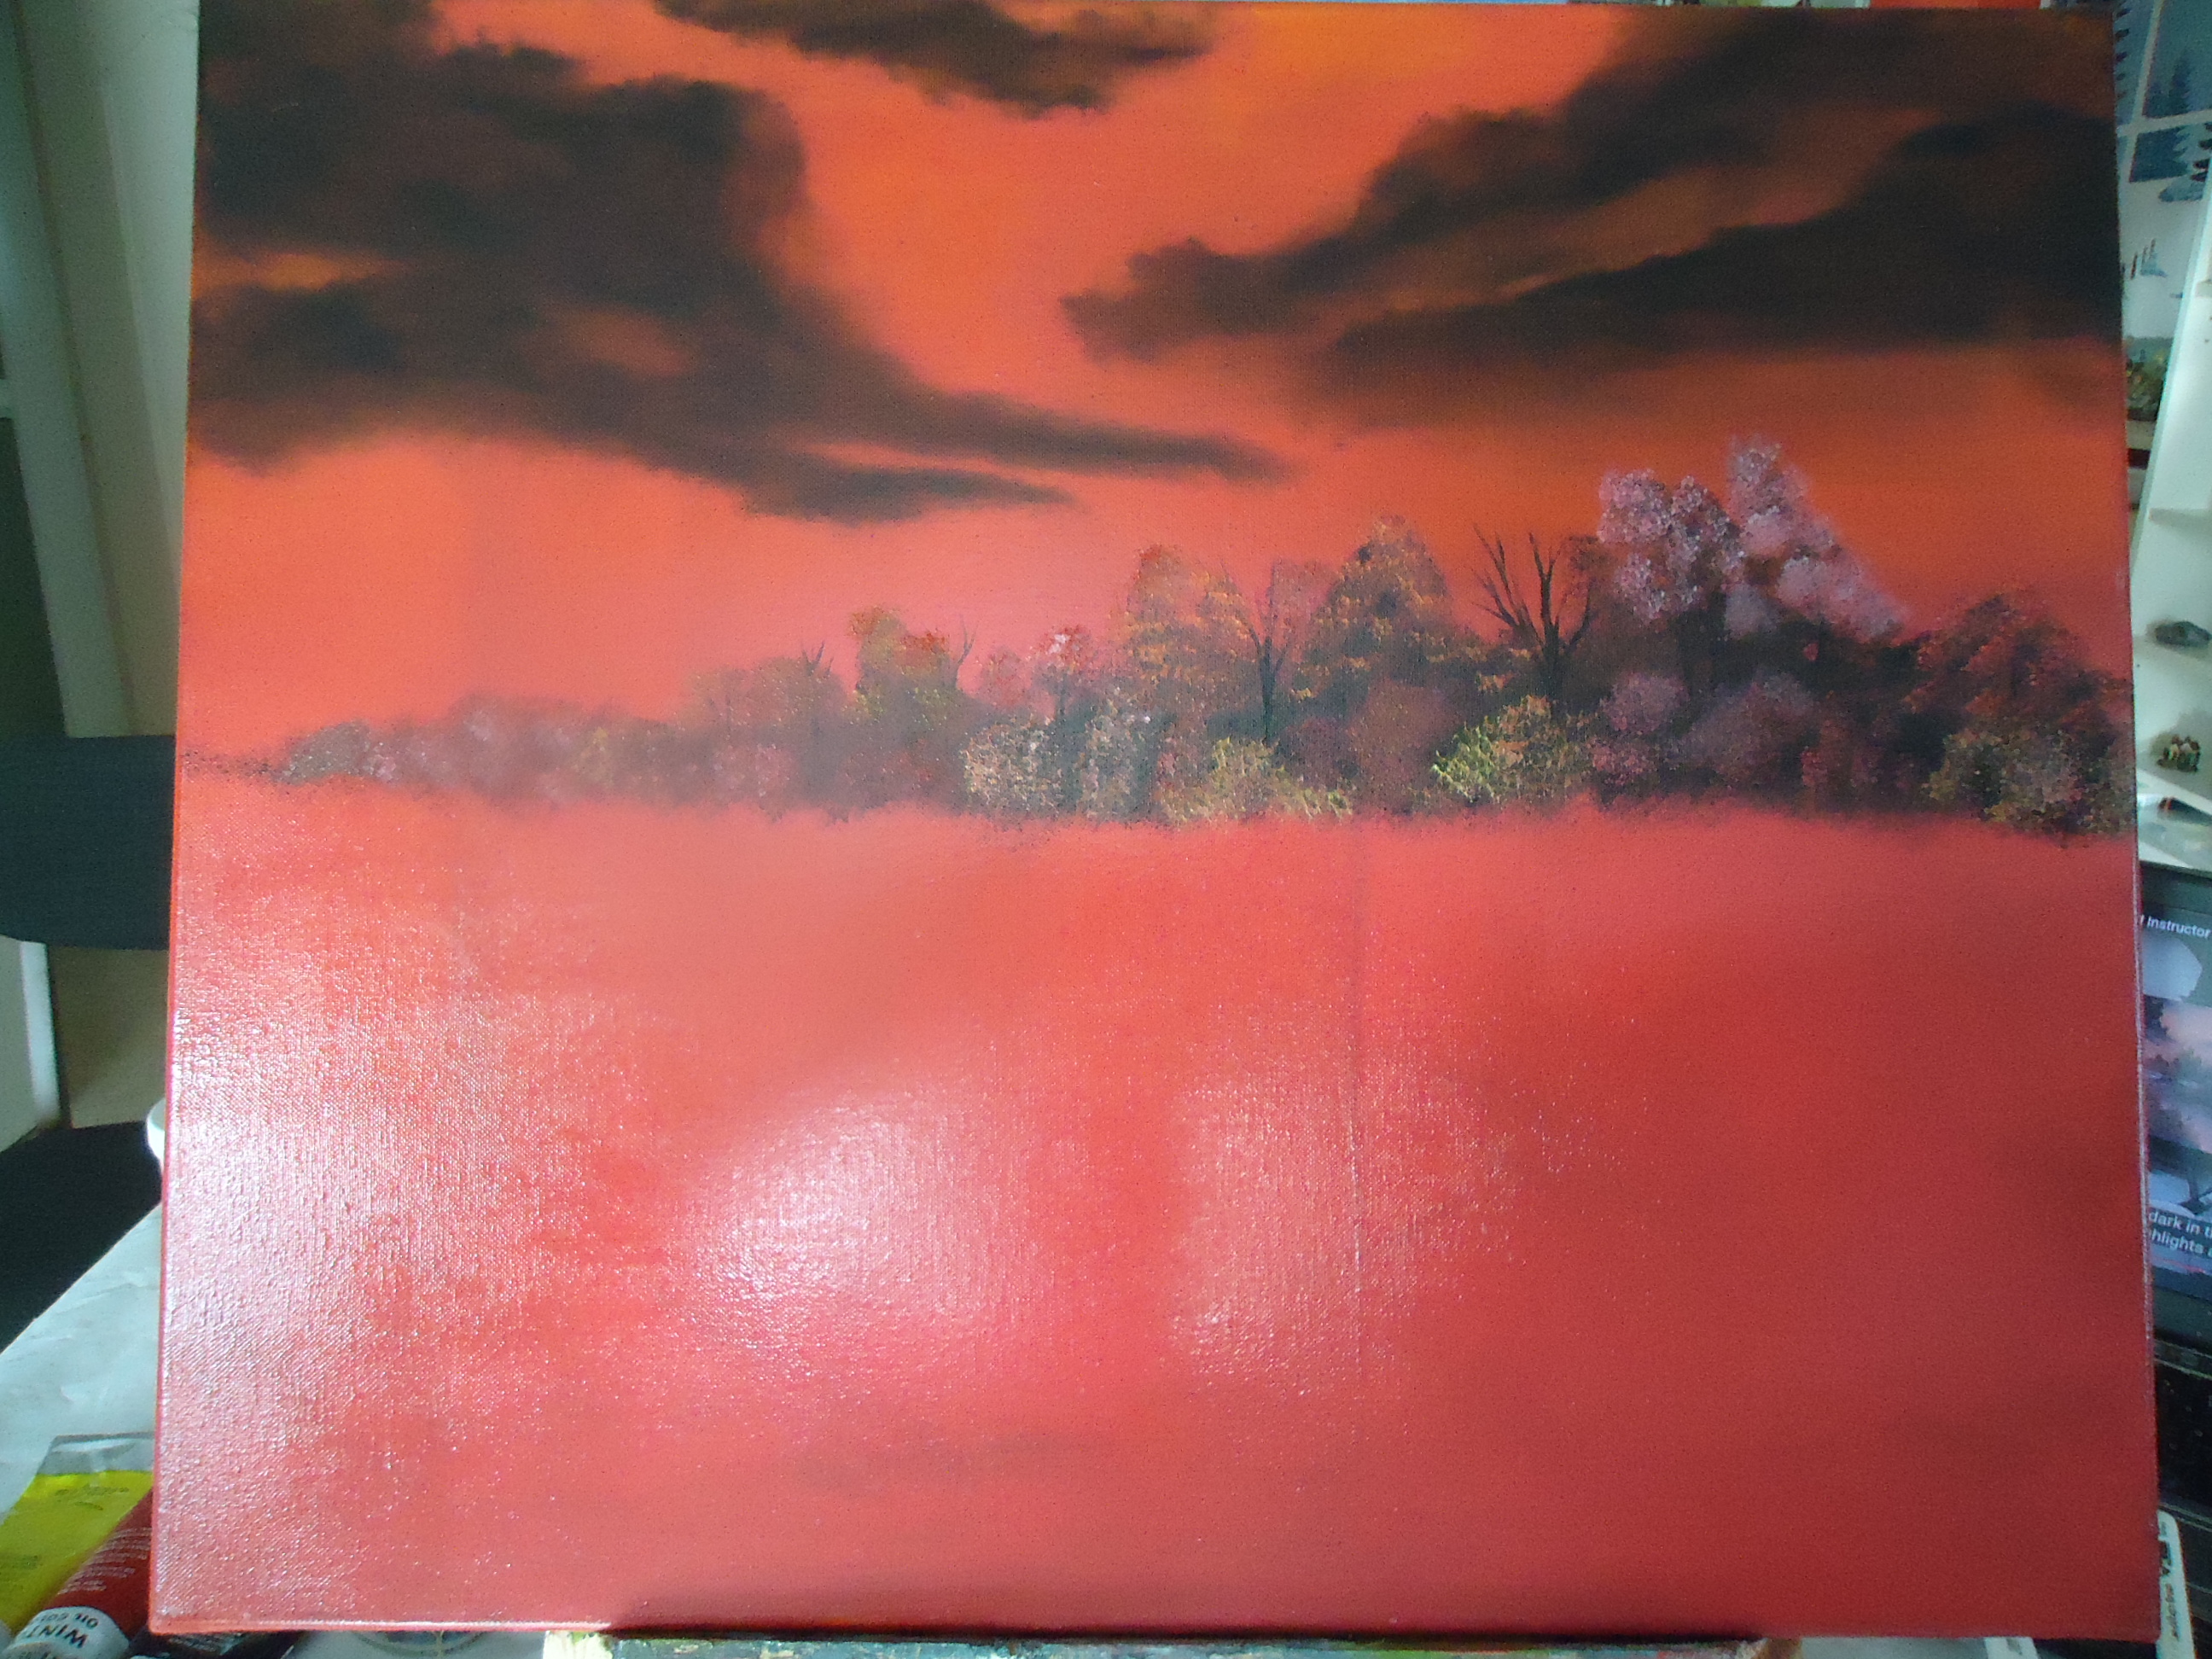
4. Medium land strip with bushes/trees:
Proceed exactly as the back land strip. Only here for the foliage, you can brighten up all of the colouring a bit more since we are closer to the viewer's eye.
If desired, scratch in few branches, or even add a dead tree (all optional).
5. 2nd layer of water:
Same as the first layer! Here, you might consider to add a little more white in the water at the side end (left) cause the water will be a bit more in motion there.
6. Front land strip with bushes/trees and a path:
Take the 2 inch or the one inch and tap a tree in on the left (you decided how big it needs to be) and then form a line of bushes gently downwards and sideways (creating a triangle shape). Make sure the formed triangle is filled up, it does not need a 100% full cover where the path will be.

Again here, add the highlights as you desire but only the top row of the bushes, since we need to create a path first. Take some VDBrown (some remains of the black added is okay) and gently swipe a path with the knife. If a knife isn't your thing, you might also use the dirty fan brush from the clouds to swipe that path. Then, add the highlights of the path with knife or fan brush, use a marbled mixture of dark sienna and some T-white. The lesser wipes you make, the more accentuated the path will be with its white and brown marbling.
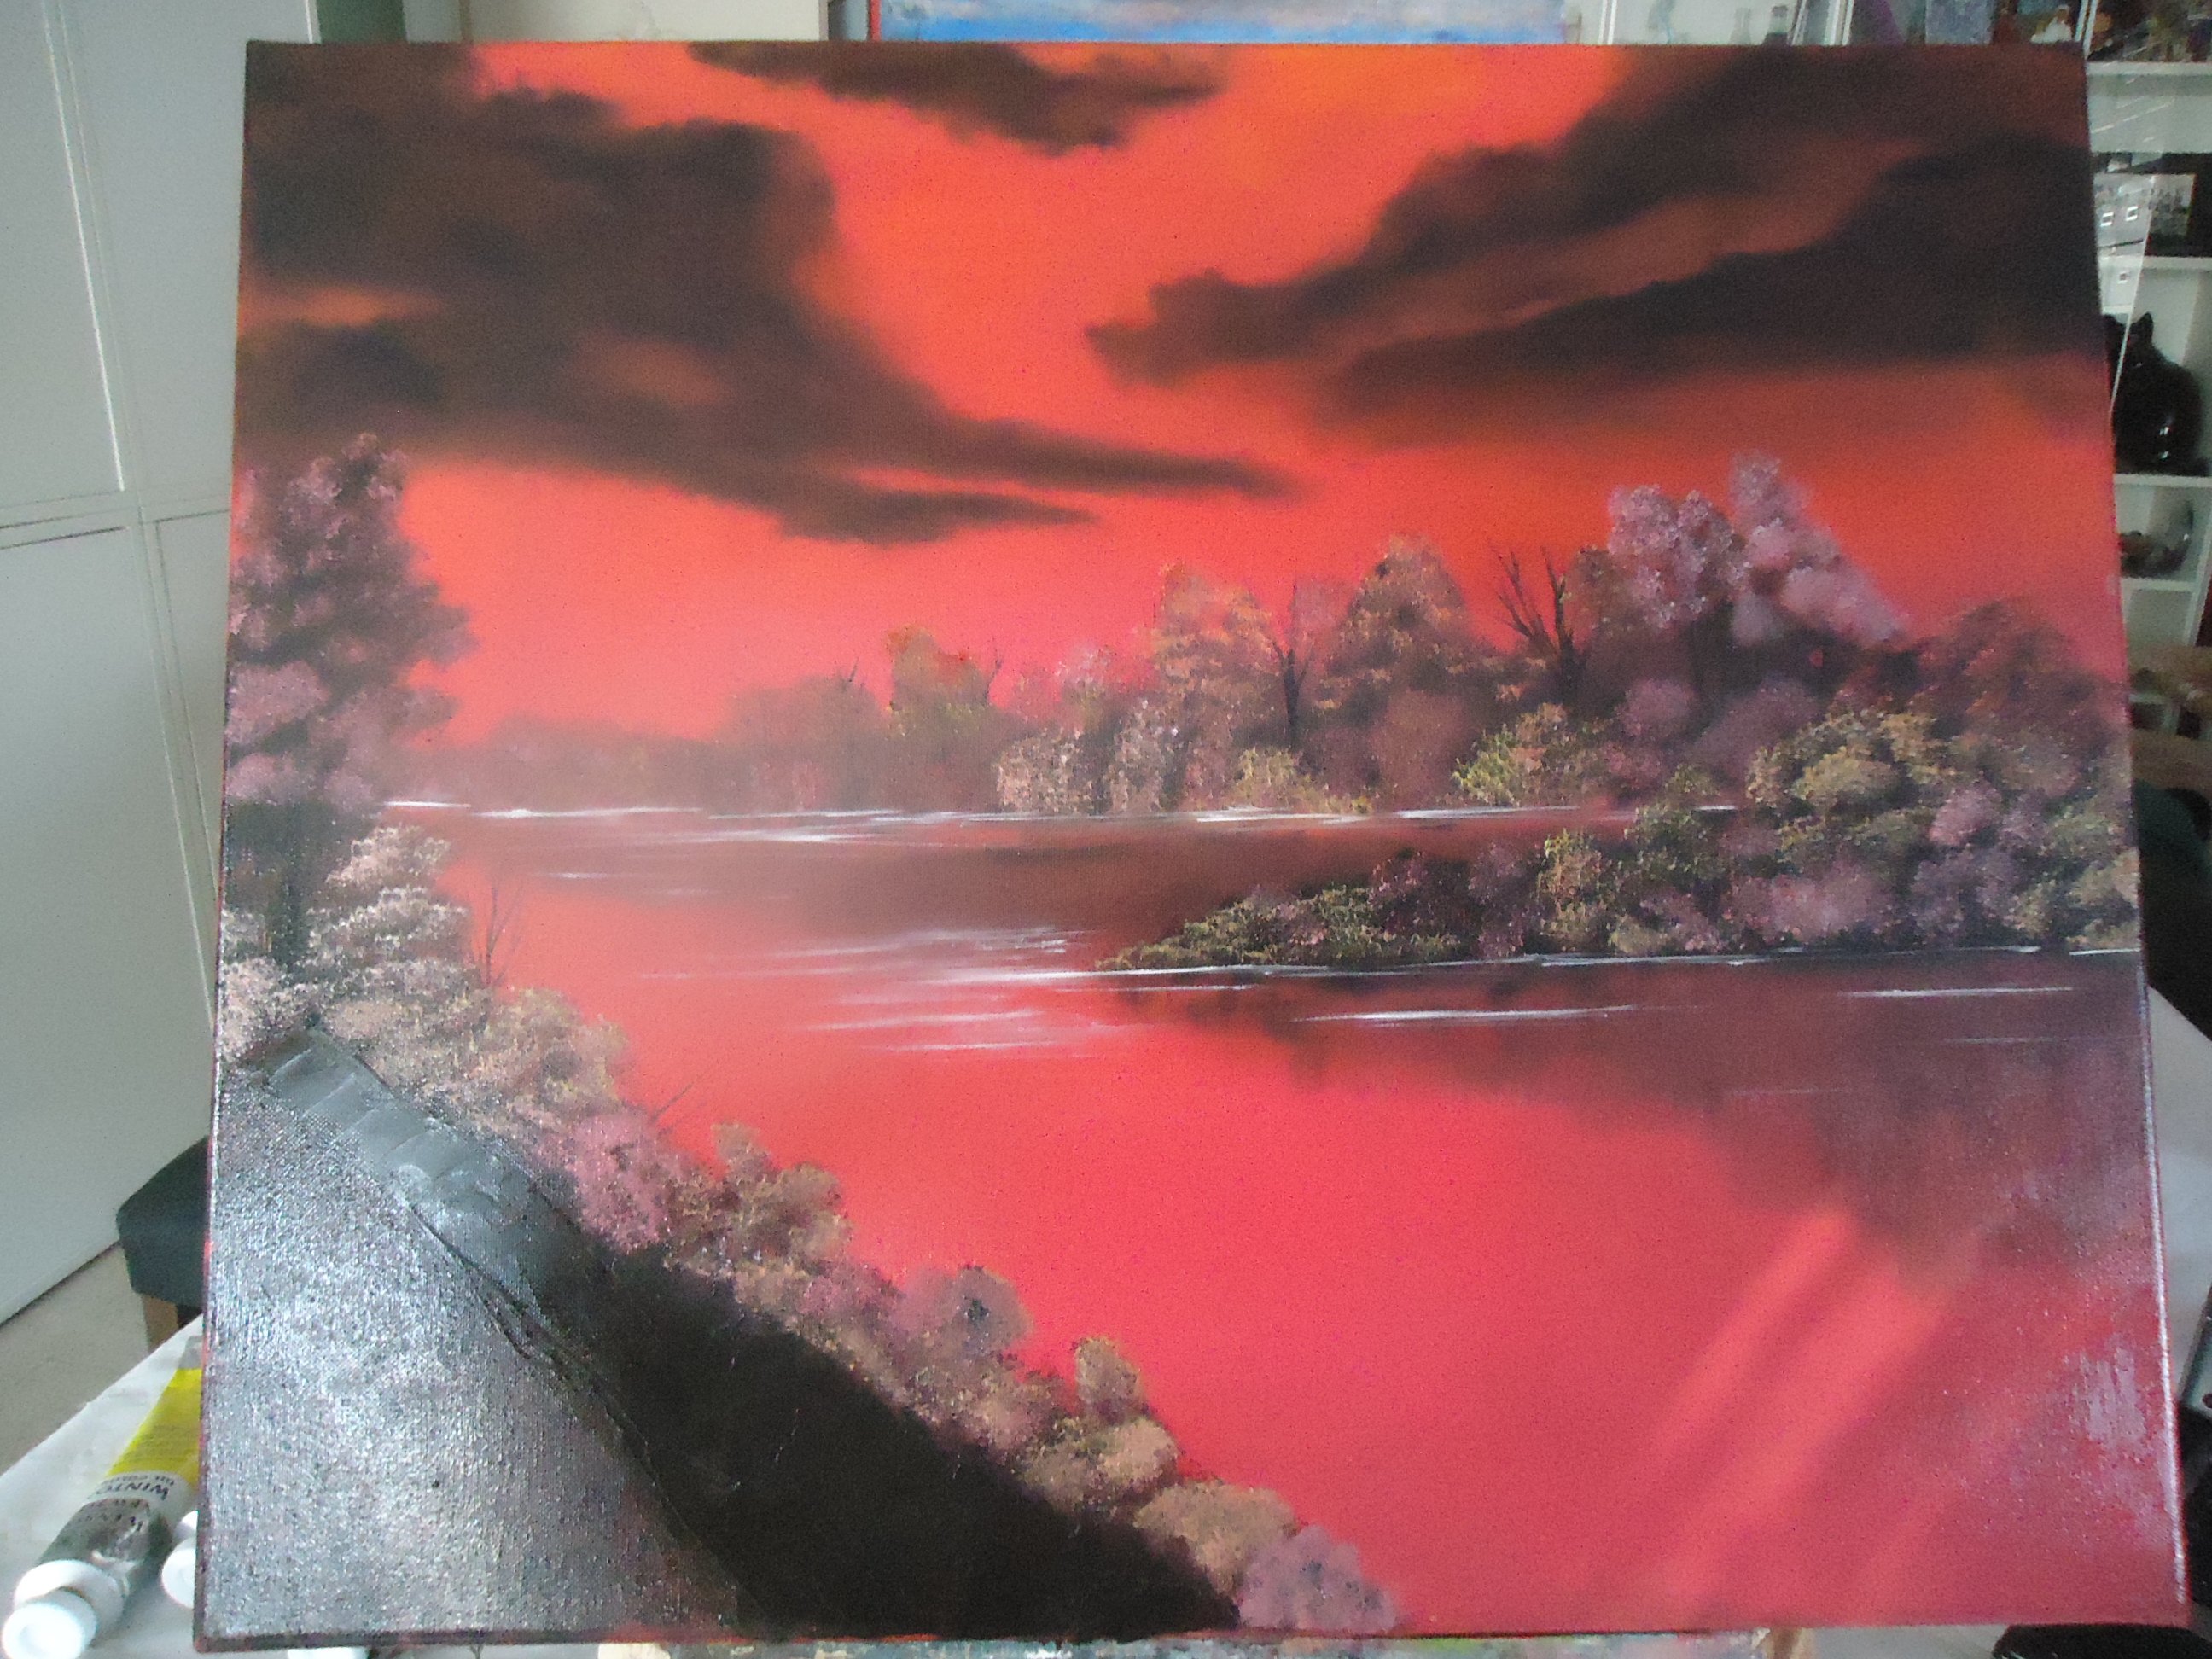
Then form the bottom bushes and highlight them.
Where you like, scratch some branches and add some dead branches. You might even consider some longer grassleaves or stems here and there.
7. The signature:
Take a few steps backwards, gently roll your head left and right, close your left eye now and then, mumble approval or dissaproval between your teeth and sign the creation/creature with some thinned paint.
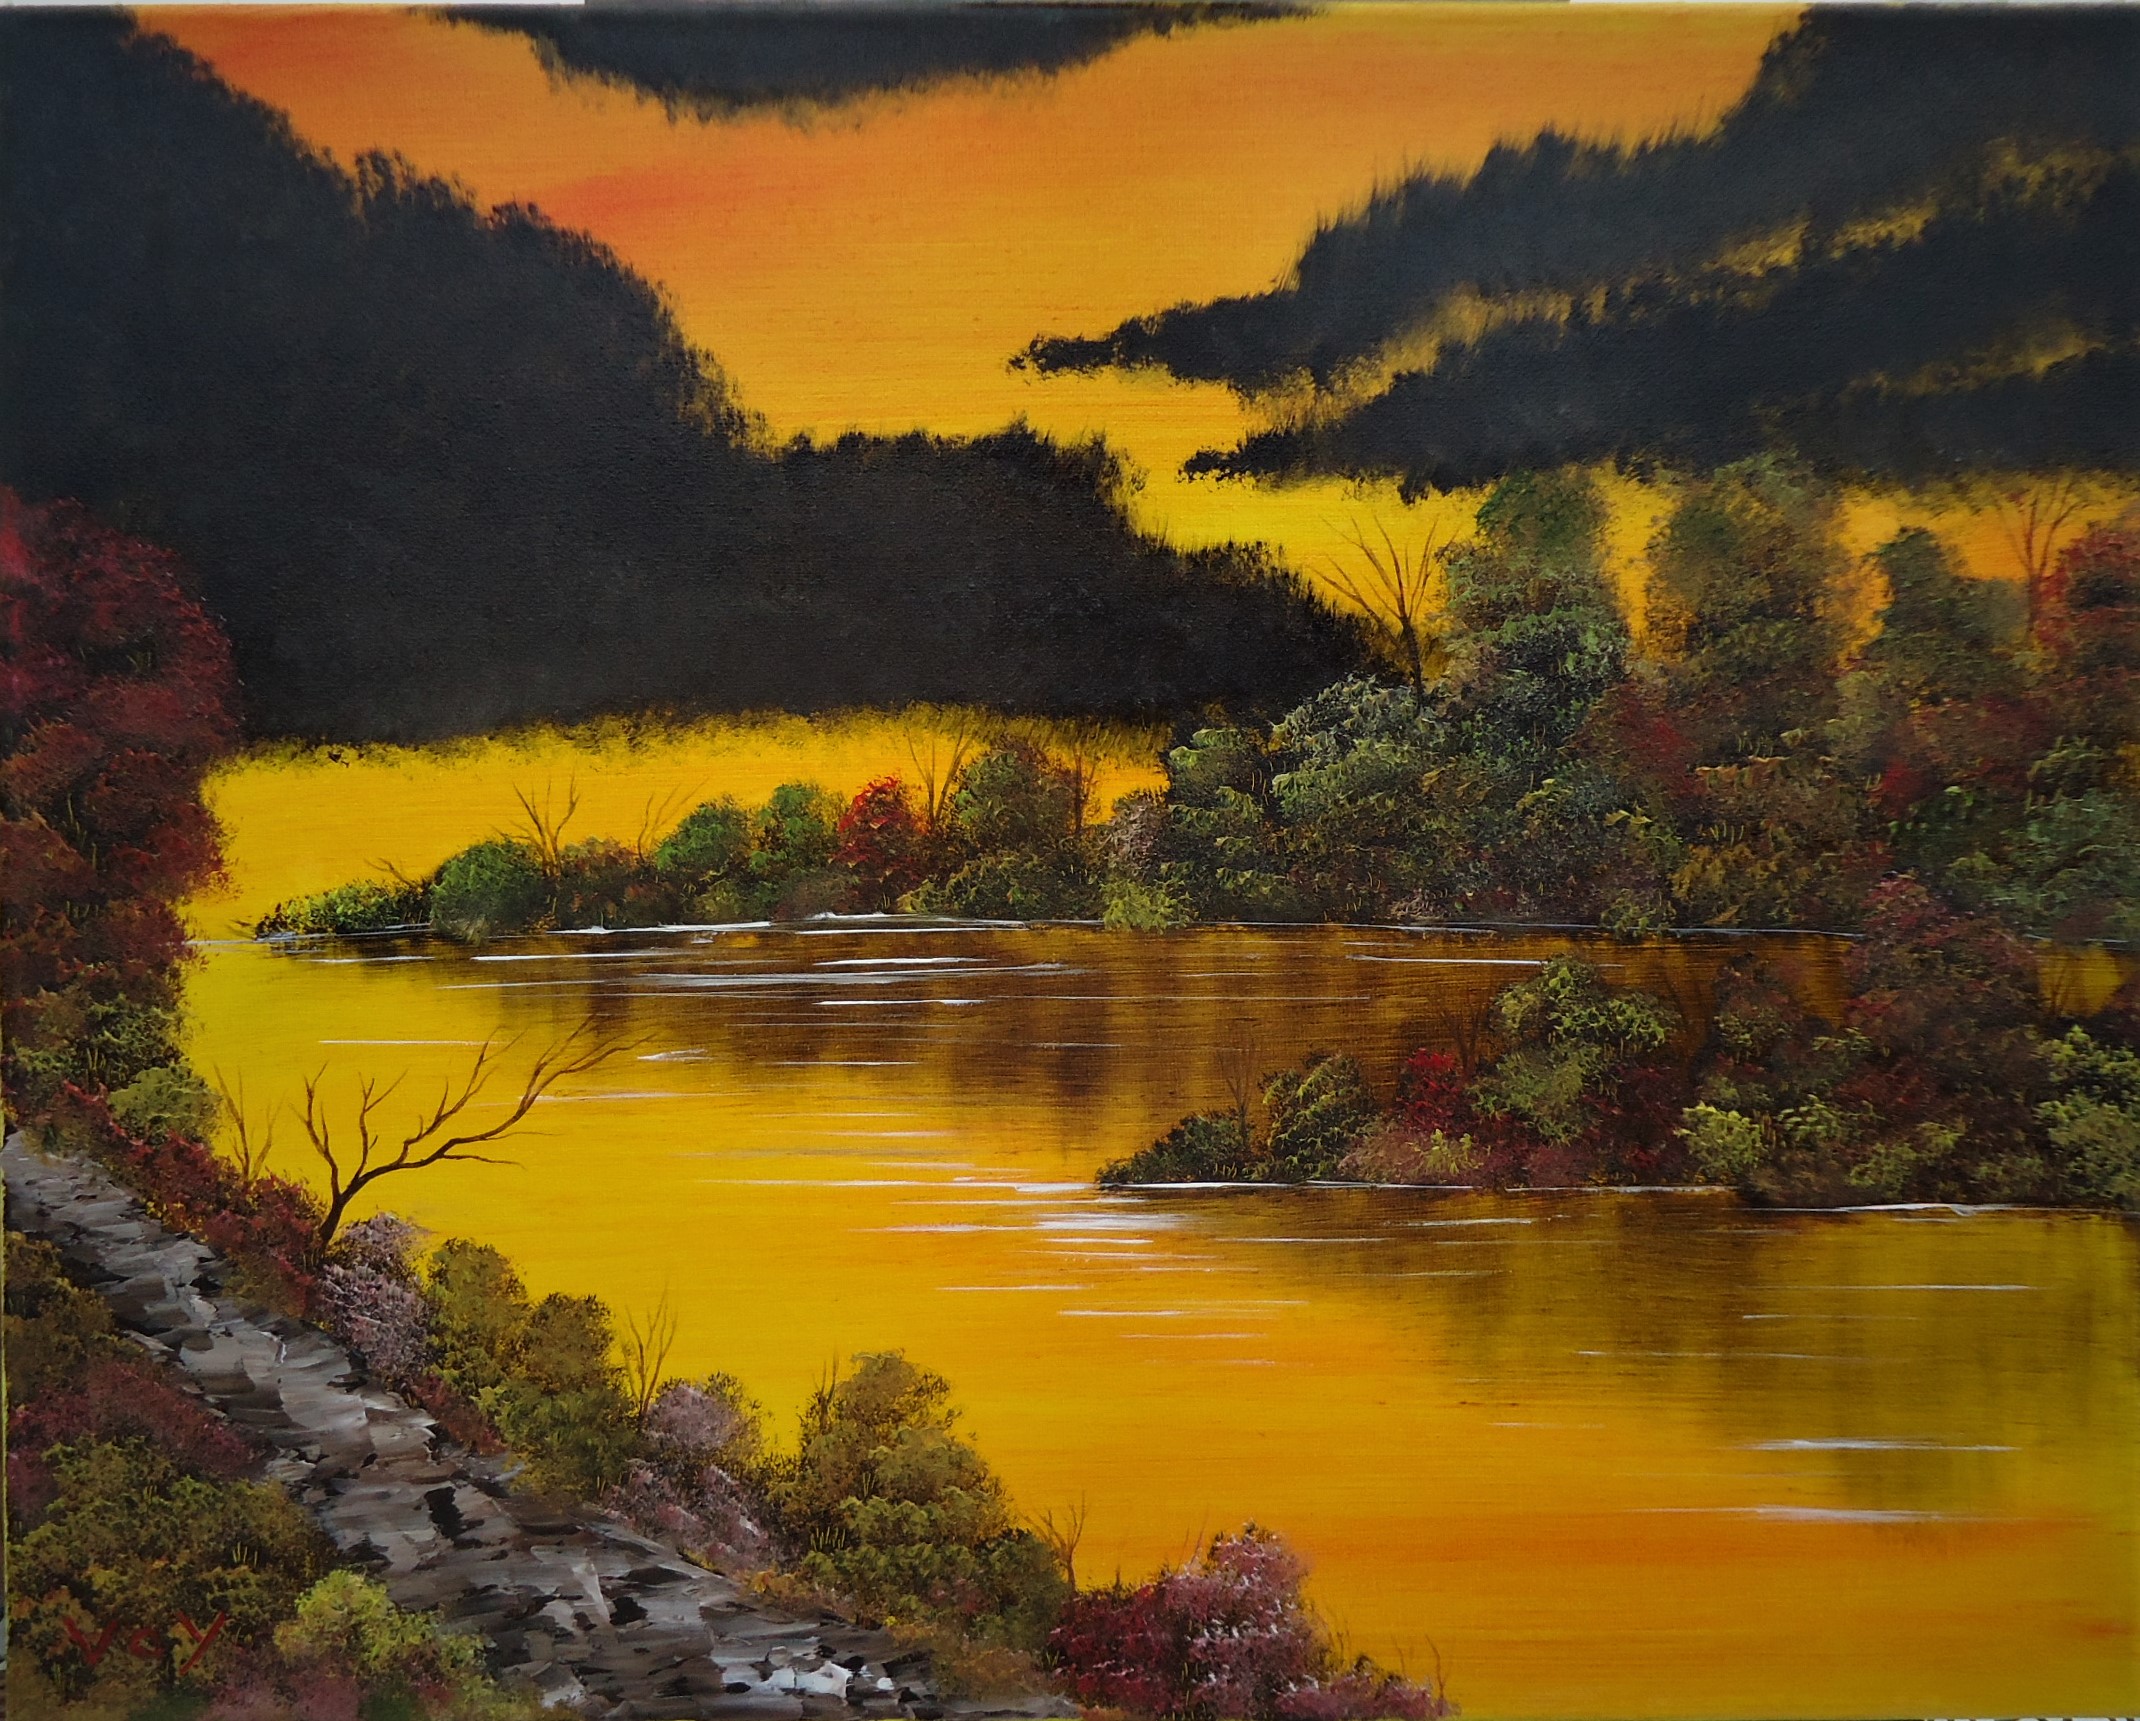
The same creation in yellow/orange:
ADDITIONAL: Resusing and or cleaning brushes.
* Brush for applying the reddish sky needs to be cleaned.
* Brush for the background bushes and trees can be used throughout the entire painting!
* Brush for applying the highlights can be used throughout the entire painting!
* Scriptliner can be used throughout the entire painting!
* Fan brush for the clouds (if used) can be used for the pathway as well.
Please have a go at this creation, it is really not difficult at all and wil put any room on fire where you display it!
SUCCESS!!
Great article Voy! Thank you so very much for these nice instructions!