One of the things most beginners find hard to do when first painting along with Bob Ross are mountains.
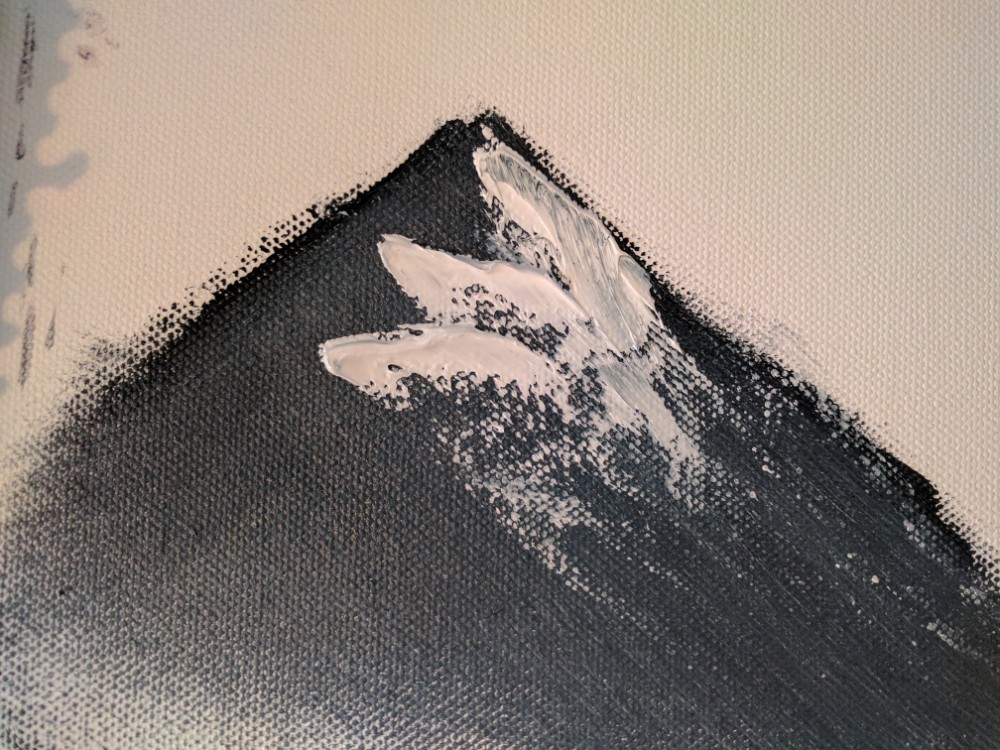
They struggle with getting the paint to ‘break’ like Bob does, and while the old master creates the illusion of terrain with a swift movement of the hand and a small roll of paint on his knife, they are stuck with the same roll on the painting and with almost no breakage and no terrain, just like pictured below:
One solution to this problem is to just slap a lot more paint on the canvas and call it a day, just like I did in my first painting:
But here is the thing: Since a lot people start painting with rather cheap oil paints the problem is not their technique but the paint itself!
Oil paint in its basic form consists of particles of pigment suspended in a drying oil and the Titanium White that Bob Ross uses is a rather firm and dry paint, meaning that it does not contain as much oil as other paints. The original Bob Ross Titanium White is made for the wet-on-wet-technique while other oil paints, especially cheaper ones, contain way more oil than the Bob Ross variant. But there is a way to upgrade even the cheapest oil paints you can find to get better results!
To show you this trick I went out and got the cheapest paints I could find. A 12x12ml (or 12×0.4oz) set of them cost me around 4$, so one tube is a little more than 30 cents.
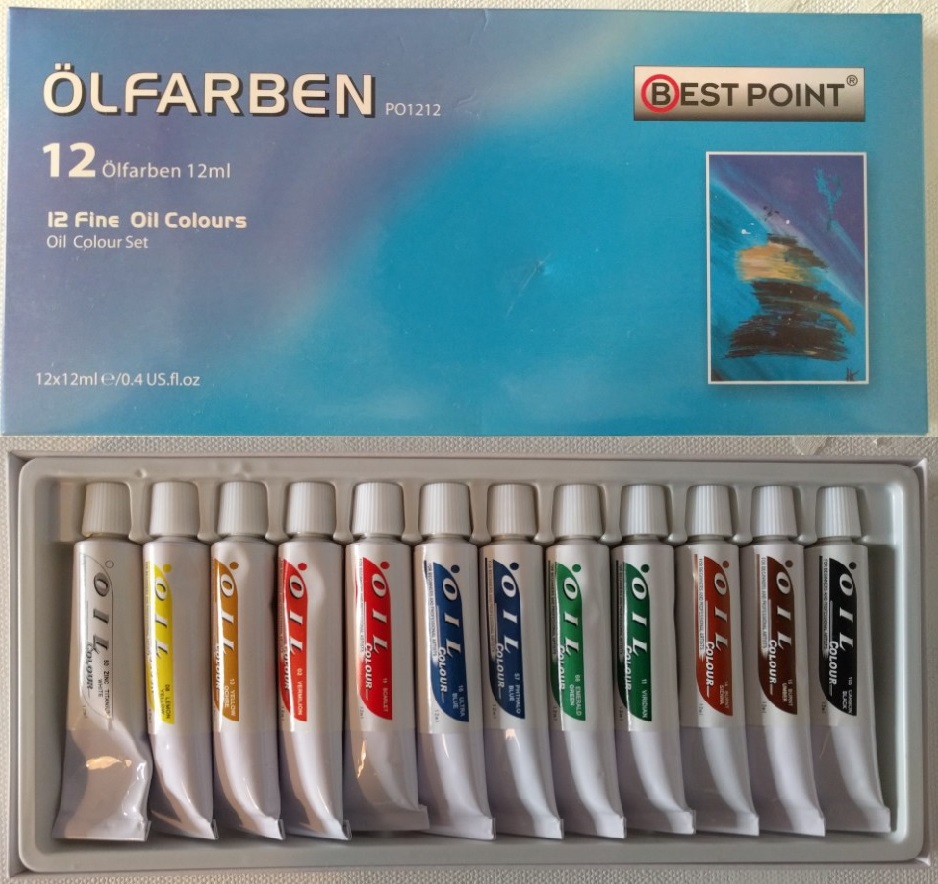
And just as one would expect the paints are not the best quality and just as firm as the baby owl that Bob had on his show one time. Not firm at all.
As mentioned above oil paints are made from pigment and oil, so to get our paint to become firmer we need to find a way to decrease the amount of liquid oil in our paint, while keeping the amount of pigment.
While there are stories about the old masters of oil painting leaving their paints out to dry over weeks and waiting for the day the paint had the perfect ratio of oil to pigments we don’t have time for this. So here is the trick:
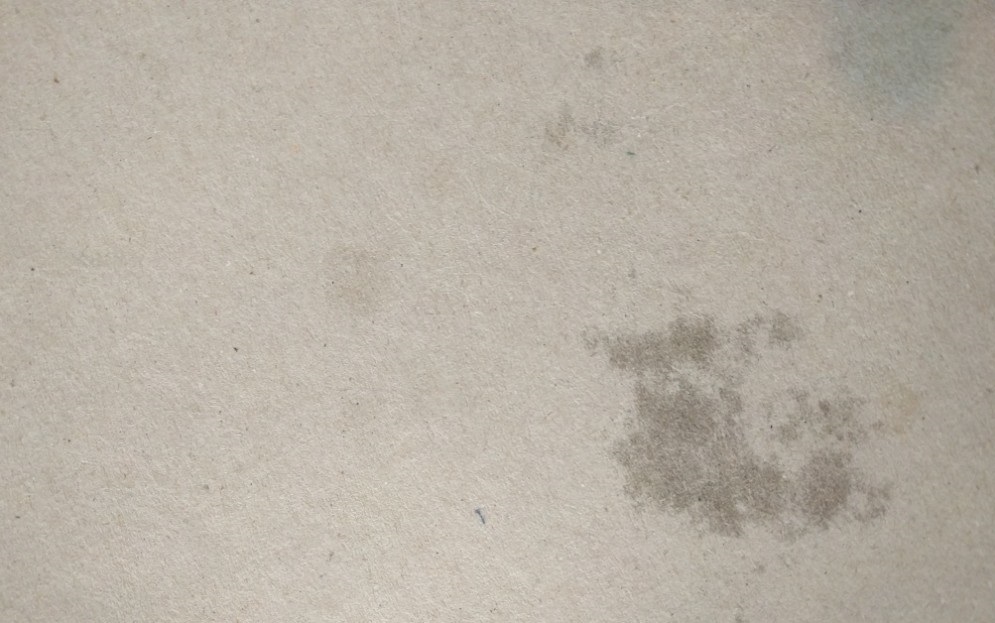
All you have to do is take some cardboard (I like to use the back of notepads as they seem rather absorbent) and spread your paint on it.
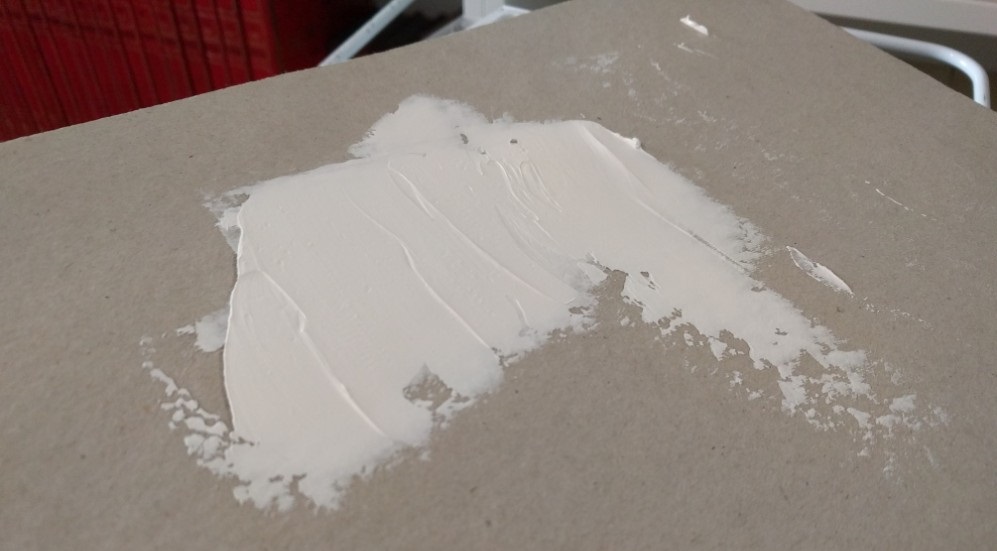
After around thirty minutes you should start seeing spots and stains of oil on the backside. This is the cardboard sucking the oil out of your paint.
Now it’s time so see if your paint is firm enough:
Just scrape it off with your palette knife, put it on the palette and check the firmness. If it still very runny you can just put it back on the carton and wait for another fifteen minutes.
Be sure to not leave it there too long.
After around one hour the paint simply becomes too dry and won’t leave your knife when applying it on the canvas. If this is the case simply add a little bit of fresh white and mix it thoroughly.
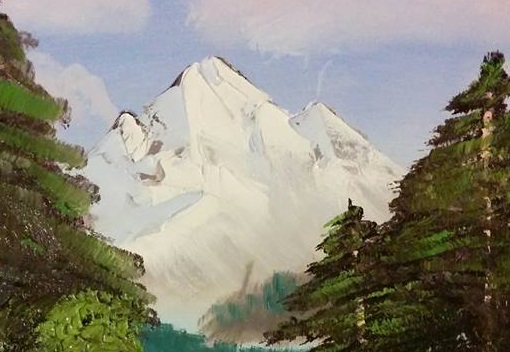
This is what happened to me, and since I didn’t have any white left I just scraped the paint from the first mountain I did and mixed it, which is why the snow on the second one has a little darker color. So I put down a rough mountain outline and applied some paint.
Below you can see the results using Titanium White fresh out of the tube and using paint that was dryed with this trick.
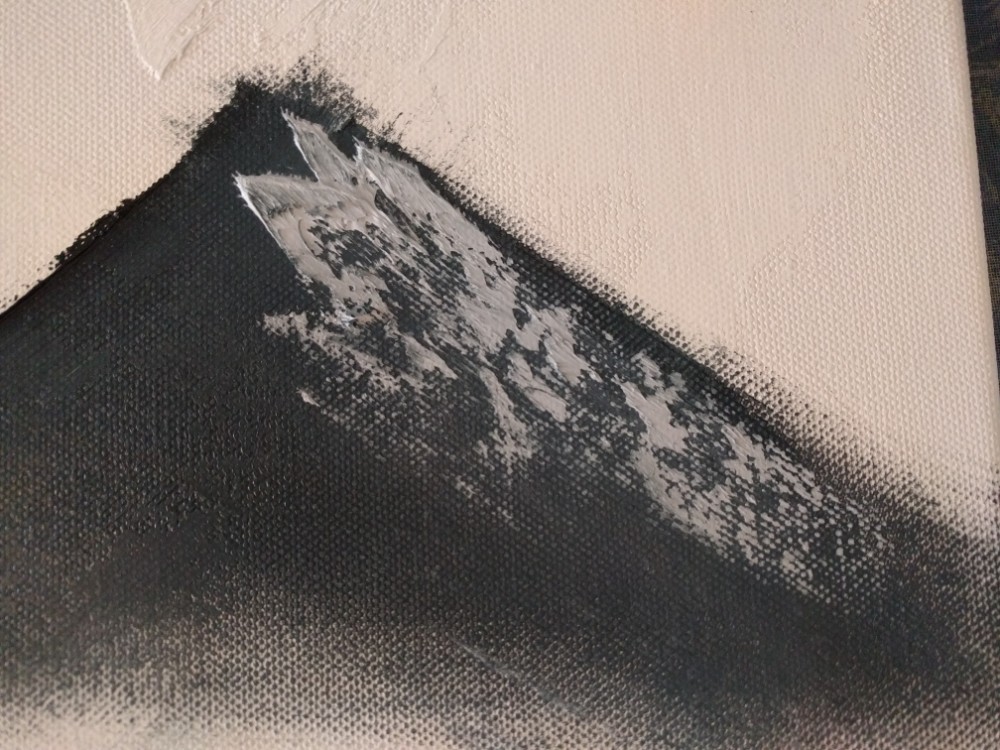
While the breakage is not as good as Bob’s you can clearly see the effect of ‘upgrading’ the paint by drying it.
So while you will get the best results using the original Bob Ross products this technique might push your paintings to the next level, while your oil paints stay on the same.
I hope this trick helps you with your mountains.
Nice! Definitely going to try this!